Sample Portlet: HelloUserJSR168PortletSample
Overview of HelloUserJSR168PortletSample
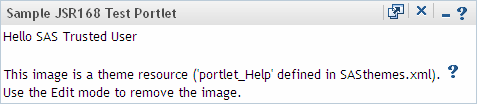
The HelloUserJSR168PortletSample
portlet is a JSR 168 portlet that greets the user by using the name
of the user who is logged on. The portlet also displays images that
are packaged with the portlet and retrieves resources from the theme
service. The portlet features VIEW, EDIT, and HELP modes.
The portlet calls a
Web application named sample.hellouser.jsr168.war, which uses SAS
Foundation Services to access session information from the Portal
Web application and obtain the user name of the current user. The
sample.hellouser.jsr168.war application generates an HTML fragment
that is displayed within the portlet.
Step 2: Configure the Scripting Facility
This sample uses the
Testportlet Scripting Facility that is delivered with the SAS Information
Delivery Portal. To configure the scripting facility for the sample,
follow these steps:
-
Edit the custom.properties file in your
SampleHelloUserJSR168Portletdirectory. The code that is highlighted must be changed or added to the file:# If you change the value "testportlet", make sure to rename in all properties # here as well as in the custom_config.xml. config.currprod.12byte=testportlet # Change the value of this property to be the name of your web application. config.currprod.legalname=Hello User JSR168 Portlet Sample # The value of this property should be the location where the configuration # files are placed. Make sure to change the level directory based on your # installation and make sure to rename testportlet if the value of # config.currprod.12byte changes above. install.currprod.config.dir=SAS-config-directory/Levn/CustomAppData/SampleHelloUserJSR168Portlet # Do not change the value of this property. The name might be changed if you # change the value of config.currprod.12byte above. webappsrv.testportlet.server=server # Change the value of this property to be the location of your portlet's source # code and configuration files. The name might be changed if you change the # value of config.currprod.12byte above. testportlet.install.dir=portlet-source-directory # Change the value of this property to be the name of your war and ear # file. The name might be changed if you change the value of # config.currprod.12byte above. webapp.testportlet.archive.name=sample.hellouser.jsr168 # Change the value of this property to be the context root of your web # application and the name of the portlet. The name might be changed if you # change the value of config.currprod.12byte above. webapp.testportlet.contextroot=SampleHelloUserJSR168 # Change the value of this property to be the versioned name of your web # application. This property is only used for JSR168 portlets. The name might # be changed if you change the value of config.currprod.12byte above. webapp.testportlet.display.name=Hello User JSR168 Portlet Sample # Change the value of this property to be the name of the local services # to use for the connection information. webapp.testportlet.localservices.name=SASBIPortlets4.3 # Add any other configuration properties that your JSR168 portlet and/or web # application may need.
Step 3: Create the Source Subdirectories
Perform the following
steps to create the source directories that are needed for the portlet
source:
Step 4: Copy the Picklist of Required JAR Files
Step 5: Configure Files for the Spring Framework
The sample portlet uses
the Spring Framework to integrate with the Web Infrastructure Platform.
To configure the Spring Framework for the portlet, perform the following
steps:
-
<bean id="viewerFactory"
    class="com.sas.portal.plugins.viewers.components.omr.impl.SASPortalViewerImpl">
 <constructor-arg ref="baseUrlLocator" />
</bean>

<bean id="omrSearchInfoFactory"
       class="com.sas.portal.plugins.search.components.omr.impl.OMRSearchInfoFactoryImpl">
 <constructor-arg ref="localSecuredUser" />
<constructor-arg ref="logger" />
</bean>

<bean id="searchEngine"
       class="com.sas.portal.plugins.search.components.engine.impl.SearchEngineImpl">
<constructor-arg ref="localInformationService" />
<constructor-arg ref="omrSearchInfoFactory" />
<constructor-arg ref="logger" />
</bean>
Step 6: Create the Configurable Source Files
application.xml.orig
This file uses parameters
from the custom.properties file to describe the contents of the portlet
Web application.
/Configurable/ears/sample.hellouser.jsr168/META-INF/application.xml.orig
<?xml version="1.0" encoding="UTF-8"?>
<application xmlns="http://java.sun.com/xml/ns/j2ee"
             xmlns:xsi="http://www.w3.org/2001/XMLSchema-instance"
             xsi:schemaLocation="http://java.sun.com/xml/ns/j2ee
                                 http://java.sun.com/xml/ns/j2ee/application_1_4.xsd"
             version="1.4">
    <display-name>@webapp.testportlet.display.name@</display-name>
    <description>@webapp.testportlet.display.name@</description>
    <module>
        <web>
            <web-uri>@webapp.testportlet.archive.name@.war</web-uri>
            <context-root>@webapp.testportlet.contextroot@</context-root>
        </web>
    </module>
</application>
web.xml.orig
This file uses parameters
from the custom.properties file to define settings for the portlet
Web application.
/Configurable/wars/sample.hellouser.jsr168/WEB-INF/web.xml.orig
<?xml version="1.0" encoding="UTF-8"?>
<web-app id="@webapp.testportlet.contextroot@" version="2.4"
    xmlns="http://java.sun.com/xml/ns/j2ee"
    xmlns:xsi="http://www.w3.org/2001/XMLSchema-instance"
    xsi:schemaLocation="http://java.sun.com/xml/ns/j2ee
                        http://java.sun.com/xml/ns/j2ee/web-app_2_4.xsd">

    <display-name>@webapp.testportlet.display.name@</display-name>

<!-- BEGIN Spring Integration -->
    <context-param>
      <param-name>contextConfigLocation</param-name>
      <param-value>
        /WEB-INF/spring-config/infrastructure-config.xml,
        /WEB-INF/spring-config/jps-config-local-remote.xml,
        /WEB-INF/spring-config/pc-config.xml,
        /WEB-INF/spring-config/presentation-config.xml,
        /WEB-INF/spring-config/ppm-config.xml
      </param-value>
    </context-param>
    <!-- beanRefContext.xml is currently provided as part of the sas.svcs.cluster.jar. -->
    <context-param>
       <param-name>locatorFactorySelector</param-name>
       <param-value>classpath:beanRefContext.xml</param-value>
    </context-param>
    <context-param>
       <param-name>parentContextKey</param-name>
       <param-value>config.context</param-value>
    </context-param>
    <!--
      This corresponds to the name of your SoftwareComponent
      object in the SAS Metadata Server.
    -->
    <context-param>
       <param-name>application-name</param-name>
       <param-value>@webapp.biportlets.software.component.name@</param-value>
    </context-param>
    <!-- END Spring Integration -->

    <!-- Cross Site Scripting Sanitizer -->
    <filter>
        <filter-name>SanitizingRequestFilter</filter-name>
        <filter-class>org.springframework.web.filter.DelegatingFilterProxy</filter-class>
        <init-param>
            <param-name>targetBeanName</param-name>
            <param-value>sanitizingRequestFilter</param-value>
        </init-param>
        <init-param>
            <param-name>targetFilterLifecycle</param-name>
            <param-value>true</param-value>
        </init-param>
    </filter>
    <!-- Cross Site Scripting Filter -->
    <filter-mapping>
        <filter-name>SanitizingRequestFilter</filter-name>
        <url-pattern>/*</url-pattern>
    </filter-mapping>

    <!-- logging context separation listener (this should be the FIRST listener) -->
    <listener>
        <listener-class>com.sas.svcs.logging.LoggingContextListener</listener-class>
    </listener>

    <!-- Spring Bootstrap -->
    <listener>
       <listener-class>org.springframework.web.context.ContextLoaderListener</listener-class>
    </listener>
    <listener>
       <listener-class>com.sas.portal.plugins.servlet.impl.PortletServletScopeInitializer</listener-class>
    </listener>

    <session-config>
       <session-timeout>30</session-timeout>
    </session-config>

    <!-- only comes into play if container = WebSphere -->
    <jsp-config>
        <taglib>
            <taglib-uri>http://www.sas.com/portlet</taglib-uri>
            <taglib-location>/WEB-INF/taglib/portlet-container-was-taglib.tld</taglib-location>
        </taglib>
    </jsp-config>

</web-app>
portlet.xml.orig
/Configurable/wars/sample.hellouser.jsr168/WEB-INF/portlet.xml.orig
<?xml version="1.0" encoding="UTF-8"?>
<portlet-app xmlns="http://java.sun.com/xml/ns/portlet/portlet-app_1_0.xsd"
             xmlns:xsi="http://www.w3.org/2001/XMLSchema-instance"
             xmlns:portlet="http://java.sun.com/xml/ns/portlet"
             xsi:schemaLocation="http://java.sun.com/xml/ns/portlet/portlet-app_1_0.xsd
                                /opt/SUNWps/dtd/portlet.xsd" version="1.0">

    <!-- Sample Hello User JSR168 Portlet -->
    <portlet>
        <description>A sample JSR168 SAS-enabled portlet.</description>
        <!-- *** Name used as PAR file name and displayed to user. *** -->
        <portlet-name>@webapp.testportlet.contextroot@</portlet-name>
        <display-name xml:lang="en">@webapp.testportlet.display.name@</display-name>
        <portlet-class>org.springframework.web.portlet.DispatcherPortlet</portlet-class>
        <init-param>
            <name>contextConfigLocation</name>
            <value>/WEB-INF/spring-config/hellouserjsr168portlet.xml</value>
        </init-param>
        <supports>
            <mime-type>text/html</mime-type>
            <portlet-mode>VIEW</portlet-mode>
            <portlet-mode>EDIT</portlet-mode>
            <portlet-mode>HELP</portlet-mode>
        </supports>
        <supported-locale>en</supported-locale>

        <!-- Portlet Resource Bundle  -->
        <resource-bundle>sample.res.Resources</resource-bundle>

    </portlet>

</portlet-app>
jboss-web.xml.orig
weblogic.xml.orig
This file uses parameters
from the custom.properties file to define settings that the portlet
uses in the Oracle WebLogic server.
/Configurable/wars/sample.hellouser.jsr168/WEB-INF/weblogic.xml.orig
<?xml version="1.0" encoding="UTF-8"?>
<weblogic-web-app xmlns="http://www.bea.com/ns/weblogic/90"
                  xmlns:xsi="http://www.w3.org/2001/XMLSchema-instance">
    <jsp-descriptor>
        <jsp-param>
            <param-name>page-check-seconds</param-name>
            <param-value>-1</param-value>
        </jsp-param>
    </jsp-descriptor>
    <container-descriptor>
        <servlet-reload-check-secs>-1</servlet-reload-check-secs>
        <prefer-web-inf-classes>true</prefer-web-inf-classes>
    </container-descriptor>
    <context-root>@webapp.testportlet.contextroot@</context-root>
</weblogic-web-app>
Step 7: Create the Static Source Files
edit.jsp
/Static/wars/sample.hellouser.jsr168/jsp/edit.jsp
<%@ page import="javax.portlet.*"%>
<%@ page import="java.util.*"%>
<%@ page import="sample.HelloUserJSR168PortletSample"%>
<%@ taglib uri="http://java.sun.com/portlet" prefix="portlet"%>
<%@ taglib uri="http://java.sun.com/jsp/jstl/core" prefix="c"%>
<%@ taglib uri="http://java.sun.com/jsp/jstl/fmt" prefix="fmt"%>

<portlet:defineObjects/>
<%
    PortletURL actionUrl = renderResponse.createActionURL();
%>

<fmt:setLocale value="${sas_portlet_locale}" />
<fmt:setBundle basename="sample.res.Resources" />

<form name="<portlet:namespace />_form1" method="post" action="<%=actionUrl.toString()%>">
        <div class="portlet-font" >
            <fmt:message key="edit1.txt"/>
            <p>
            <fmt:message key="edit2.txt"/>
            <p>
            <input type="hidden"
                name="<%=HelloUserJSR168PortletSample.FORM_ACTION%>"
                value="<%=HelloUserJSR168PortletSample.ACTION_UPDATE%>" />
            <input class="button" type="submit"
                value='<fmt:message key="ok.txt"/>'
                alt='<fmt:message key="ok.txt"/>'
                />
        </div>

</form>

<c:if test="${PARAM_THEME_IMAGE_PATH != null}">
    <form name="<portlet:namespace />_form2" method="post" action="<%=actionUrl.toString()%>">
            <div class="portlet-font" >
                <fmt:message key="edit3.txt"/>
                <p>
                <input type="hidden"
                    name="<%=HelloUserJSR168PortletSample.FORM_ACTION%>"
                    value="<%=HelloUserJSR168PortletSample.ACTION_REMOVE%>" />
                <input class="button" type="submit"
                    value='<fmt:message key="remove.txt"/>'
                    alt='<fmt:message key="remove.txt"/>'
                    />
            </div>
    </form>
</c:if>
help.jsp
/Static/wars/sample.hellouser.jsr168/jsp/help.jsp
<%@ page import="java.util.*"%>
<%@ taglib uri="http://java.sun.com/jsp/jstl/core" prefix="c"%>
<%@ taglib uri="http://java.sun.com/portlet" prefix="portlet"%>

<portlet:defineObjects/>

<%
    String filename = renderResponse.encodeURL(renderRequest.getContextPath())+"/images/Note.gif";
    ResourceBundle rb = portletConfig.getResourceBundle(renderRequest.getLocale());
%>

<div class="portlet-font" >
     <%= rb.getString("help1.txt") %>
     <br/>
     <%= rb.getString("help2.txt") %>
</div>

<img src="<%=filename%>" alt="Note.gif Image" title="Note GIF Image" />
view.jsp
/Static/wars/sample.hellouser.jsr168/jsp/view.jsp
<%@ page import="java.util.*"%>
<%@ page import="sample.HelloUserJSR168PortletSample"%>
<%@ taglib uri="http://java.sun.com/portlet" prefix="portlet"%>
<%@ taglib uri="http://java.sun.com/jsp/jstl/core" prefix="c"%>
<%@ taglib uri="http://java.sun.com/jsp/jstl/fmt" prefix="fmt"%>

<portlet:defineObjects/>

<%
    String themeImagePath =
      (String)renderRequest.getAttribute(HelloUserJSR168PortletSample.PARAM_THEME_IMAGE_PATH);
%>

<fmt:setLocale value="${sas_portlet_locale}" />
<fmt:setBundle basename="sample.res.Resources" />

<div class="portlet-font" >
    <fmt:message key="view1.txt"/>
    <c:out value="${PARAM_USERNAME}" />
</div>

<c:if test="${PARAM_THEME_IMAGE_PATH != null}">
    <br/>
    <fmt:message key="view2.txt"/>
    <img src="<%=themeImagePath%>" />
    <br/>
    <fmt:message key="view3.txt"/>
</c:if>

<br/>
HelloUserJSR168PortletSample.java
Note: The filename and file location
must match the 'portletClass' property value that is specified in
the hellouserjsr168portlet.xml Spring configuration file.
/Static/wars/sample.hellouser.jsr168/source/sample/HelloUserJSR168PortletSample.java
package sample;

import java.io.IOException;

import javax.portlet.ActionRequest;
import javax.portlet.ActionResponse;
import javax.portlet.GenericPortlet;
import javax.portlet.PortletConfig;
import javax.portlet.PortletException;
import javax.portlet.PortletMode;
import javax.portlet.PortletRequestDispatcher;
import javax.portlet.PortletSession;
import javax.portlet.RenderRequest;
import javax.portlet.RenderResponse;

import org.springframework.context.ApplicationContext;
import org.springframework.web.portlet.context.PortletApplicationContextUtils;

import com.sas.framework.commons.resolvers.ThemeResolverInterface;
import com.sas.framework.themes.client.Image;
import com.sas.framework.themes.client.Theme;
import com.sas.framework.themes.client.ThemeServiceInterface;
import com.sas.framework.webapp.util.WebKey;
import com.sas.portal.portlet.toolkit.session.PortletSessionFacade;
import com.sas.portal.portlet.toolkit.session.impl.PortletSessionFacadeImpl;
import com.sas.services.ServiceException;
import com.sas.services.user.UserContextInterface;
import com.sas.svcs.authentication.client.SecurityContext;
import com.sas.svcs.authentication.client.SecurityContextHolder;

public class HelloUserJSR168PortletSample extends GenericPortlet {

    /** used by the JSP to get request parameters and attribute to display users name **/
    public static String PARAM_USERNAME = "PARAM_USERNAME";
    public static String PARAM_THEME_IMAGE_PATH = "PARAM_THEME_IMAGE_PATH";

    public static String FORM_ACTION = "FORM_ACTION";
    public static String ACTION_UPDATE = "UPDATE";
    public static String ACTION_REMOVE = "REMOVE";

    public static String _viewJsp;
    public static String _editJsp;
    public static String _helpJsp;
    public static String _errorJsp;

    public void init()  {
        PortletConfig portletConfig = getPortletConfig();
        /** these have to match property values
            from WEB-INF/spring-config/hellouserjsr168portlet.xml **/
        _viewJsp = portletConfig.getInitParameter("viewPage");
        _editJsp = portletConfig.getInitParameter("editPage");
        _helpJsp = portletConfig.getInitParameter("helpPage");
        _errorJsp = portletConfig.getInitParameter("errorPage");
    }

    protected void doView(RenderRequest request, RenderResponse response) throws PortletException,
            IOException {
        String forwardPage = null;

        /** get a UserContext from the PortletSessionFacade **/
        PortletSessionFacade sessionFacade = PortletSessionFacadeImpl.getSessionFacade(request);
        UserContextInterface userContext = sessionFacade.getUserContext();
        try {
            String userName = userContext.getPerson().getDisplayName();
            // set request parameters as attributes for use by JSTL
            request.setAttribute(PARAM_USERNAME, userName);
            // get the PortletSession to determine if the image should be displayed
            PortletSession ps = request.getPortletSession();
            // see if theme name exists as the result of a processAction call
            String themeImagePath = (String) ps.getAttribute(PARAM_THEME_IMAGE_PATH);
            request.setAttribute(PARAM_THEME_IMAGE_PATH, themeImagePath);
            forwardPage = _viewJsp;
        } catch (ServiceException e) {
            forwardPage = _errorJsp;
            e.printStackTrace();
        }
        // forward request to jsp
        PortletRequestDispatcher rd = getPortletContext().getRequestDispatcher(forwardPage);
        rd.include(request, response);
    }

    public void doHelp(RenderRequest request, RenderResponse response) throws
        IOException, PortletException {
        PortletRequestDispatcher rd = getPortletContext().getRequestDispatcher(_helpJsp);
        rd.include(request, response);
    }

    public void doEdit(RenderRequest request, RenderResponse response) throws PortletException, IOException {
        PortletSession ps = request.getPortletSession();
        String themeImagePath = (String) ps.getAttribute(PARAM_THEME_IMAGE_PATH);
        request.setAttribute(PARAM_THEME_IMAGE_PATH, themeImagePath);

        PortletRequestDispatcher rd = getPortletContext().getRequestDispatcher(_editJsp);
        rd.include(request, response);
    }

    public void processAction(ActionRequest request, ActionResponse response)
        throws PortletException {
        PortletSession ps = request.getPortletSession();
        // retrieved from the form action hidden field name EDIT_ACTION
        String action = request.getParameter(FORM_ACTION);
        // ACTION_UPDATE is the value of the hidden field named EDIT_ACTION
        if (action != null) {
            if (action.equals(ACTION_UPDATE)) {
                /** demonstrates accessing WIP Services to get a theme **/
                // set the SecurityContext as a thread local attribute needed by WIP Services
                SecurityContext sc = (SecurityContext)request.getPortletSession()
                    .getAttribute(WebKey.SECURITY_CONTEXT, PortletSession.APPLICATION_SCOPE);
                SecurityContextHolder.setSecurityContext(sc);
                // get the ApplicationContext and ThemeResolver to access the theme service to get the theme
                // name being used
                ApplicationContext appContext =
                   PortletApplicationContextUtils.getWebApplicationContext(request.getPortletSession().getPortletContext());
                ThemeResolverInterface themeResolver =
                   (ThemeResolverInterface)appContext.getBean("themeResolver");
                String themeName = themeResolver.getCurrentThemeName();
                ThemeServiceInterface themeService = (ThemeServiceInterface)appContext.getBean("themeService");
                Theme theme = themeService.getTheme(themeName);
                // get theme resource to display in View (an image defined in SASthemes.xml)
                Image image = theme.getImage("portlet_Help");
                String imagePath = image.getFile();
                ps.setAttribute(PARAM_THEME_IMAGE_PATH, imagePath);
            } else if (action.equals(ACTION_REMOVE)) {
                ps.removeAttribute(PARAM_THEME_IMAGE_PATH);
            }
        }
        response.setPortletMode(PortletMode.VIEW);
    }
}
Resources.properties
Note: The filename and file location
must match the value of the 'setBundle' property that is specified
in the edit.jsp file.
/Static/wars/sample.hellouser.jsr168/source/sample/res/Resources.properties
javax.portlet.title=Sample JSR168 Test Portlet
javax.portlet.short-title=JSR168 Test Portlet
javax.portlet.keywords=SAS, UserContext, JSR168, test

# View mode text
view1.txt=Hello
view2.txt=This image is a theme resource ('portlet_Help' defined in SASthemes.xml).
view3.txt=Use the Edit mode to remove the image.

# Edit mode text
edit1.txt=You are in Edit mode.
edit2.txt=The OK button will retrieve a resource (image) from the SAS ThemeService.
edit3.txt=The Remove button will remove the Theme image from the View mode.

# Help mode text
help1.txt=You are in Help mode.
help2.txt=This shows an image that is included with the portlet.

#buttons
ok.txt=Ok
remove.txt=Remove
interceptors.xml
This file creates the
Spring Framework interceptors for the portlet. Interceptors handle user requests for portlet features.
/Static/wars/sample.hellouser.jsr168/WEB-INF/spring-config/interceptors.xml
<?xml version="1.0" encoding="UTF-8" ?>
<!DOCTYPE beans PUBLIC "-//SPRING//DTD BEAN//EN" "../../dtd/spring-beans.dtd">
<beans>
  <!-- HandlerIntercepters -->
  <bean id="sasPortletInterceptor"
        class="com.sas.portal.portlet.toolkit.interceptor.SASPortletInterceptor" />
  <bean id="backToPortalInterceptor"
        class="com.sas.portal.portlet.toolkit.interceptor.BackToPortalInterceptor" />
</beans>
hellouserjsr168portlet.xml
Note: The filename and file location
must match the 'contextConfigLocation' property value that is specified
in the portlet.xml file.
/Static/wars/sample.hellouser.jsr168/WEB-INF/spring-config/hellouserjsr168portlet.xml
<?xml version="1.0" encoding="UTF-8" ?>
<!DOCTYPE beans PUBLIC "-//SPRING//DTD BEAN//EN" "../../dtd/spring-beans.dtd">
<beans>
  <import resource="interceptors.xml" />
    <bean id="HelloUserJSR168PortletSampleBean"
          class="org.springframework.web.portlet.mvc.PortletWrappingController">
      <property name="portletClass">
        <!-- This is the class name for the sample portlet. -->
        <value>sample.HelloUserJSR168PortletSample</value>
      </property>
      <property name="useSharedPortletConfig">
        <value>false</value>
      </property>
      <property name="initParameters">
        <props>
          <prop key="viewPage">/jsp/view.jsp</prop>
          <prop key="editPage">/jsp/edit.jsp</prop>
          <prop key="helpPage">/jsp/help.jsp</prop>
          <prop key="errorPage">/jsp/error.jsp</prop>
        </props>
      </property>
    </bean>
    <!-- Handler Mappings -->
    <bean id="portletModeHandlerMapping"
          class="org.springframework.web.portlet.handler.PortletModeHandlerMapping">
      <property name="interceptors">
        <list>
          <ref bean="sasPortletInterceptor"/>
        </list>
      </property>
      <property name="portletModeMap">
        <map>
          <entry key="view"><ref bean="HelloUserJSR168PortletSampleBean"/></entry>
          <entry key="edit"><ref bean="HelloUserJSR168PortletSampleBean"/></entry>
          <entry key="help"><ref bean="HelloUserJSR168PortletSampleBean"/></entry>
        </map>
      </property>
    </bean>
</beans>
Step 9: Prepare the Development Environment
Step 10: Compile the Source Code
Step 11: Load the Portlet into BI Portlets Custom Content Area
-
Modify the properties file for the PDT. Update the file
SAS-config-directory/Levn/Web/Applications/SASBIPortlets<version>/PortletDeploymentTool/src/build.propertieswith the changes that are highlighted:################################################################ # # Properties that will change for each portlet ear processed # ################################################################# # the webapps ServletContext name. the value needs to be the same # as the value of the <context-root> tag in the # META-INF/application.xml file of the portlet ear. # # example: SASBIDashboardJsr168 servlet-context-name=HelloUserJSR168PortletSample # the name of the war file that will be processed inside the portlet # ear. Note that this version of the Portlet Deployment Tool can only # process one war file. # # example: sas.bidashboardjsr168 web-app-name=sample.hellouser.jsr168 # the app server to which the portlet ear file will be deployed. # valid entries are jboss, weblogic, and websphere # # example: websphere web-app-server=server-type # name of the portlet ear file. # # example: sas.bidashboardjsr1684.2.ear portlet-ear-file-name=sample.hellouser.jsr168.ear # full path to the portlet ear file. # # example: c:/SAS/EntBIServer/Levn/Web/Staging/portlet-ear-file-name portlet-ear-file-path=SAS-config-directory/Levn/Web/Staging/sample.hellouser.jsr168.ear # work directory for temporary files. # # example: c:/temp/pdt work-dir=SAS-config-directory/Levn/Web/Temp/PDT # whitespace-separated list of portlet modes supported by the portlet. # valid values are "all", "edit", "help". Note that view mode # must always be supported so is not listed here. If the list is empty, # it is assumed that only view mode is supported. If "all" is specified, # it is assumed that view, edit, and help modes are supported. supported-portlet-modes=all
Step 12: Rebuild the Web Applications
The EAR files for the
SAS Information Delivery Portal and the BI Portlets Web applications
contain files that are associated with each portlet. To add the new
portlet, you must rebuild the Web applications by using the SAS Deployment
Manager. For more information, see "Rebuilding the SAS Web Applications"
in the "Middle-Tier Administration" chapter of the SAS
Intelligence Platform: Web Application Administration Guide.