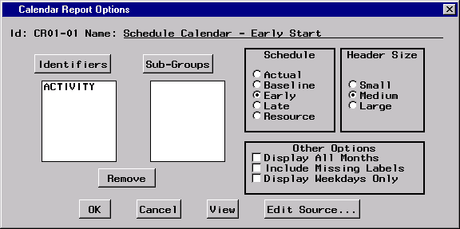
Calendar Report Options Window
This window provides access to the settings and options available for calendar reports. By changing values in this window, you can create and customize calendar reports to meet your specific needs. Note that some options may be unavailable if the active project does not contain the appropriate data. Also, if data unique to a specific project are required by a report, that report may fail when generated for a different project.
Note that reports can be generated and viewed to verify the results before any changes are saved. Access to the source code is also provided.
For a description of standard report options, see the section Standard Options.

Schedule
The setting of the Schedule option indicates which project schedule is to be used to mark activities on the calendar. You can choose from the actual, baseline, early, late, and resource-constrained schedules.
Header Size
This option specifies the type of heading to use in displaying the name of the month and year on the calendar report. When Small is selected, the month and year are displayed on one line. For the Medium selection, the month and year are displayed in a box 4-lines high, while the Large selection will display the month name 7-lines high (the year is included if space is available).
Display All Months
When selected, this check box specifies that all months between the first and last activity start and finish dates, inclusive, are to be displayed (including months that contain no activities). If this check box is cleared, months with no activities are omitted from the report.
Include Missing Labels
When selected, this check box specifies that missing values of identifier variables will appear in the label of an activity. If this option is not selected, missing values are ignored in labeling activities.
Display Weekdays Only
When selected, this check box specifies that only days from Monday through Friday are to be displayed in the calendar.