Building a Shared Dimension
Introduction
When you work with
SAS OLAP cubes, it is often the case that you share dimensions across
many cubes. Updates to the dimension can occur over time. The cubes
that contain that dimension must be able to reflect those changes.
A SAS shared dimension provides a common dimension that is created
and updated in one place and is automatically reflected across all
cubes that use the dimension.
Enter General Information for the Shared Dimension
After you have established
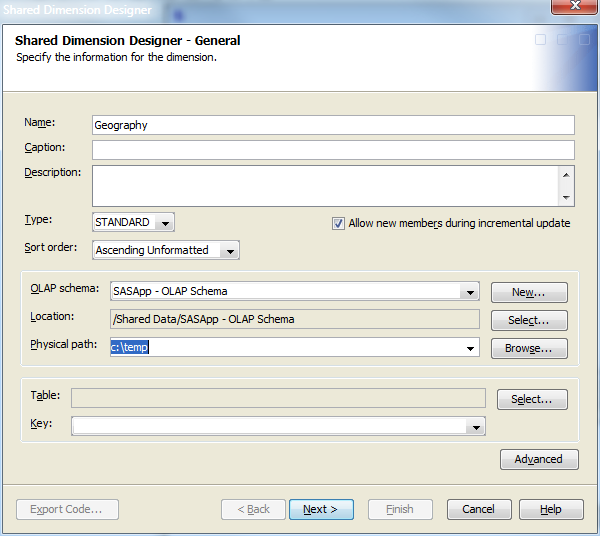
a connection profile, you can begin to create the shared dimension. Select File NewShared
Dimension. On the Shared Dimension
Designer – General page, enter the basic dimension
information, as shown in the following display.
NewShared
Dimension. On the Shared Dimension
Designer – General page, enter the basic dimension
information, as shown in the following display.
Select a Dimension Table
Click the Select button to the right of the Table field to select a shared dimension table. The Select dialog box appears. If the table does not exist for your dimension,
click Register Table and then define the
source that you will import your metadata from. The following display
shows the selection of the dimension table GEOGDIM.
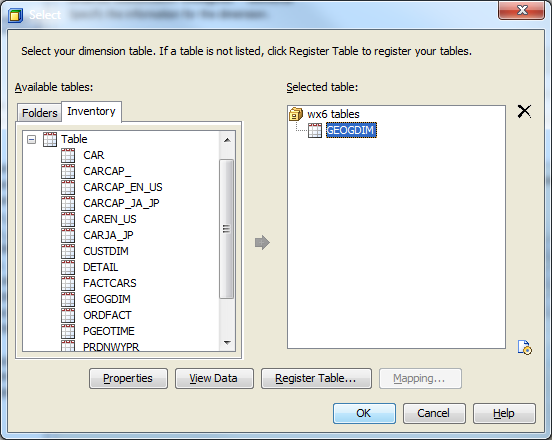
Table Options
To specify options that
are used to open the table, click the  button next to the Selected table box. In the Table Options dialog box, specify
data set options that are used to open the data set. For example,
you could enter a WHERE clause or other information to subset or filter
the data in the table as it is opened.
button next to the Selected table box. In the Table Options dialog box, specify
data set options that are used to open the data set. For example,
you could enter a WHERE clause or other information to subset or filter
the data in the table as it is opened.
button next to the Selected table box. In the Table Options dialog box, specify
data set options that are used to open the data set. For example,
you could enter a WHERE clause or other information to subset or filter
the data in the table as it is opened.
The table options are
stored as part of the cube and then reapplied when the data is accessed
at run time. You can also specify data set options in the Dimension Designer – General page (for use with
star schemas) and the Stored Aggregates dialog
box (for use with summarized tables). For more information, see “Data
Set Options” in SAS Language Reference: Concepts.
Select a Dimension Key
After you select a dimension
table, you return to the Shared Dimensions – General page to specify a key column for that dimension. The key column
in the shared dimension table links the records in that table to the
records in the fact table of the star schema. Use the menu in the Key field to select the key column.
Note: A key column is not needed
for the shared dimension definition, but it is required when you associate
a shared dimension to a cube.
Click Next to open the Dimension Designer – Levels page, and then click Add to open the Add Levels dialog box.
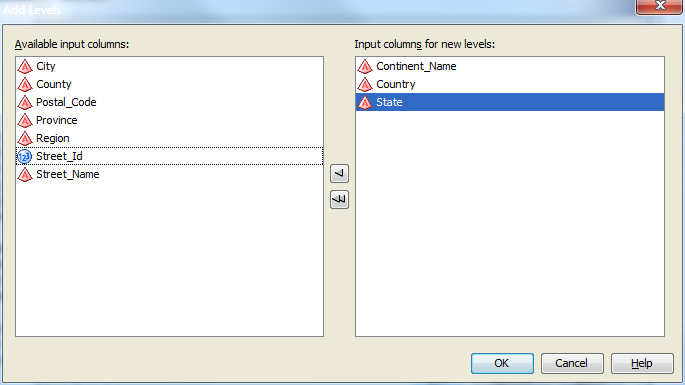
In the Add
Levels dialog box, select the levels that you want to
add to the dimension, and then click OK to
return to the Shared Dimension Designer – Level page. You can now define properties such as format, time type, and
sort order for the levels that you have selected. See the following
display.

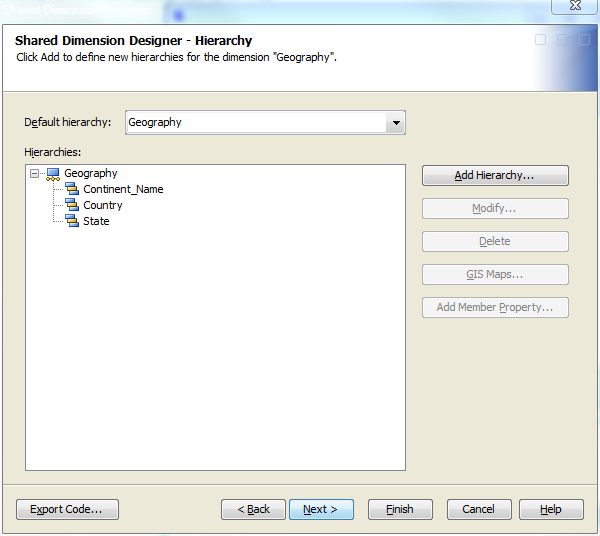
When your levels are
complete, click Next to display the Shared Dimension Designer – Define a Hierarchy page. In that page, you apply levels to hierarchies. A default hierarchy
is created for you. The default hierarchy includes all levels, in
the order in which they appear in the previous Level page, as shown in the following display.
Using a Shared Dimension in a Cube
Shared dimensions are
used in cubes that are built from star schemas. To use a shared dimension,
open the Cube Designer and begin defining the cube, as
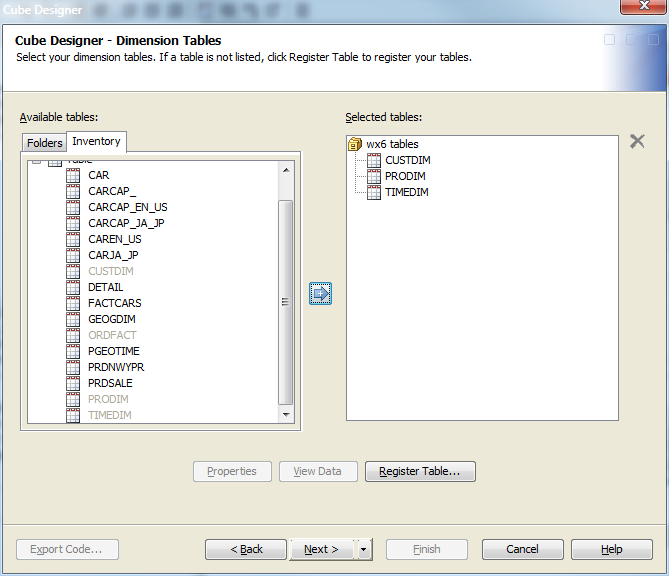
described in Building a Cube from a Star Schema . When you arrive at the Cube Designer –
Dimension Tables page, do not
select the table for the shared dimension. Select all of the other
tables, but do not select the shared dimension table. The following
display shows that the shared dimension table GEOGDIM has not been
selected.
When you complete your
selection of non-shared dimension tables, click Next to return to the Cube Designer – Dimensions page.
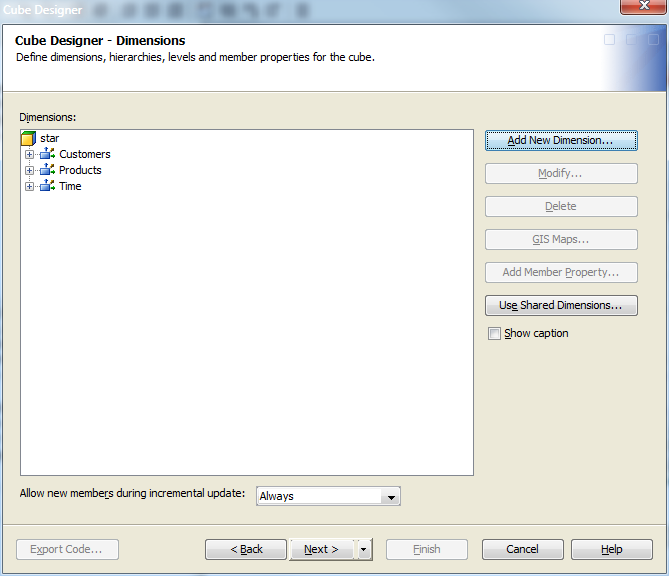
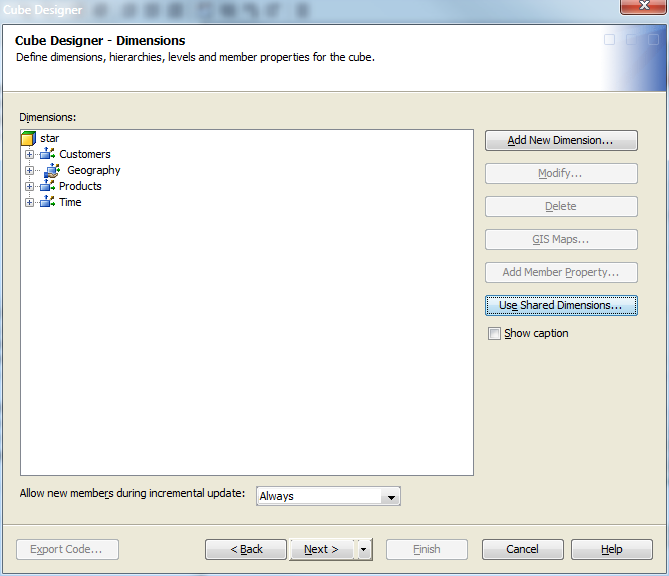
When you have configured
your non-shared dimensions, click Use Shared Dimensions to display the Use Shared Dimensions dialog
box, as shown in the following display.
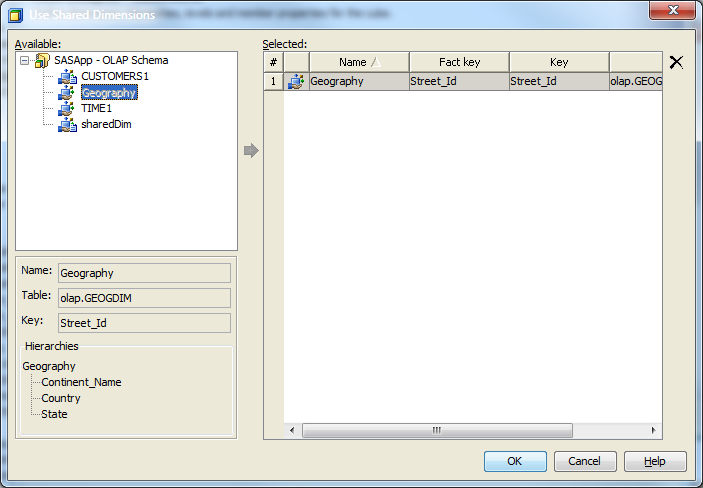
Select the shared dimension
and specify the key column in the fact table that links to the key
column in the shared dimension table. In this example the Street_ID column from the fact table ORDFACT links to
the Street_Id column of the shared dimension
table GEOGDIM. Select OK to return to the Cube Designer – Dimensions page. The shared dimension
is listed with the other dimensions, as shown in the following display.