Indexing an Aggregation Table

Introduction to Indexes

An index is a component of a SAS data set that enables SAS to access observations in the SAS data set quickly and efficiently. The purpose of SAS indexes is to optimize WHERE clause processing and to facilitate BY-group processing. SAS IT Resource Management supports indexes for summarized and simple aggregation tables.
  • Summarized Aggregations: You can create additional indexes manually.
    CAUTION:
    Do not create unique indexes for summarized aggregation tables.
  • Simple Aggregations: Indexes are not automatically created for input columns that are specified for aggregation tables. However, you can create indexes manually.
For more information about indexes, see SAS Data Integration Studio: User's Guide or the Help for SAS Data Integration Studio.

How to Access an Index

Indexes are physically created when the aggregation job is run. To access an index, perform the following steps:
  1. Right-click the aggregation table and select Properties from the drop-down list.
  2. Select the Indexes tab.
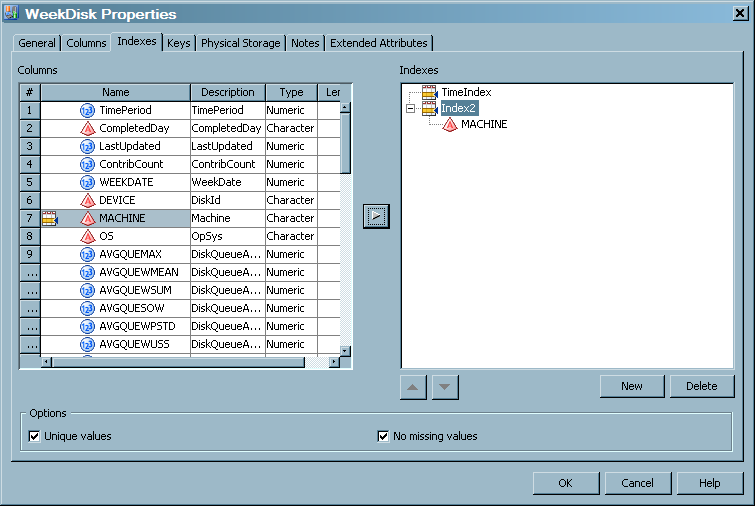
    The left panel of the Indexes tab contains a list of the columns that can be used to index the data.
    Note: Any columns that are in the table can also be in the index. For a simple aggregation table, these columns were previously specified as input columns for the table. For a summarized aggregation table, these columns were previously specified as class, ID, statistic, rank, percent change, join, or computed columns for the table.
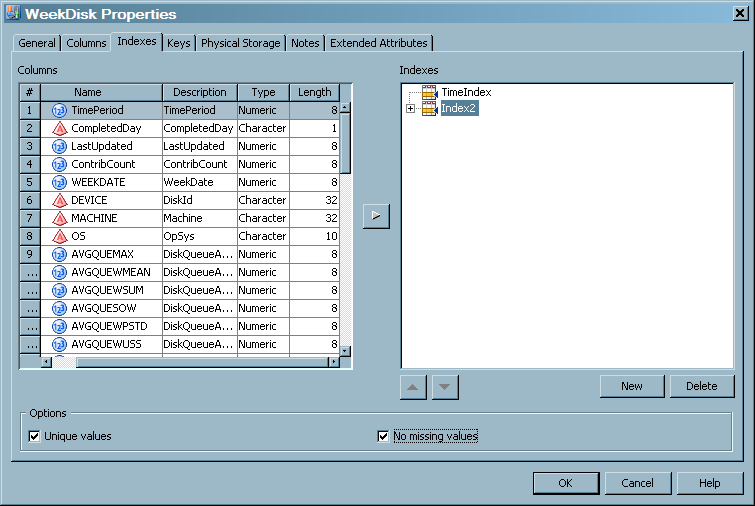
    The right panel contains the indexes that are specified for this aggregation.
    In the following display, an index called TimeIndex has already been created. A new index called Index2 is in the process of being created.
    Indexes Tab of an Aggregation Table
    Indexes tab of an aggregation table
From the Indexes tab, you can create, rename, and delete indexes.

Create an Index

To add an index, perform the following steps:
  1. Navigate to the Index tab of the aggregation table for which you want to create an index. For information about how to access an index, see How to Access an Index.
  2. Click New. An index entry (Indexn) opens in the right panel.
    Note: In the preceding display, the new index was given the default name Index2.
  3. From the left panel, select the columns that you want to index. An index must have at least one column.
  4. Use the right arrow to include them under the index entry in the right panel.
  5. Do not specify that the values of an index are to be unique, because this might interfere with the processing of the transformation.
  6. To specify that the values of an index should not include missing values, highlight the index in the right panel and click No missing values.
  7. When you finish specifying the columns that you want to index, you might want to rename the index so that it is more informative. Otherwise, click OK to save your changes and return to the process flow diagram.
    Note: At this time, if the name of a simple index is not the same as the column that is being indexed, a message box appears. It asks whether you want to change the name to conform to the name of the column. You must click Yes and change the name. Then you can save the index.
In the following display, the new index, called Index2, is specified for the column Machine. It contain only unique values and does not contain missing values.
Newly Created Index Named Index2
Newly Created Index

Delete a Column from an Index

To delete a column from an index, perform the following steps:
  1. Navigate to the Index tab of the aggregation table that you want to work with. For information about how to access an index, see How to Access an Index.
  2. From the right panel, expand the indexes that are displayed. Select the column that you want to delete.
  3. Click Delete.
  4. Click OK to save your changes and return to the process flow diagram.

Delete an Index

To delete an index, perform the following steps:
  1. Navigate to the Index tab of the aggregation table whose index you want to delete. For information about how to access an index, see How to Access an Index.
  2. Select the index that you want to delete.
  3. Click Delete.
  4. Click OK to save your changes and return to the process flow diagram.

Rename an Index

To rename the index, perform the following steps:
  1. Navigate to the Index tab of the aggregation table whose index you want to rename. For information about how to access an index, see How to Access an Index.
  2. Right-click the index entry.
  3. From the drop-down list, select Rename.
    Note: From this drop-down list, you can also add and delete indexes.
  4. Enter the new name of the index. If the index contains only one column, it is a simple index. For simple indexes, the name of the index must be the same as the column that is being indexed.
    Press the ENTER key.
  5. Click OK to save your changes and return to the process flow diagram. At this time, if the name of a simple index is not the same as the column that is being indexed, a message box appears. It asks whether you want to change the name to conform to the name of the column. You must click Yes and change the name. Then you can save the index.