Working with User-Written Staging Transformations

Create a User-Written Staging Transformation

To create a User-Written Staging transformation, perform the following steps:
  1. From the IT Data Marts tree of SAS IT Resource Management, double-click the job that is to contain the User-Written Staging transformation. The job opens on the Diagram tab of the Job Editor window.
  2. From the Transformations tree of SAS IT Resource Management, expand the ITRM Transformations folder.
  3. Scroll down to the User Written Staging entry. Drag and drop it onto the job on the Diagram tab of the Job Editor window.
  4. (Optional) Attach a source table on the left side of the transformation.
    To create a table, select Filethen selectNewthen selectTable to open the New Table wizard. Respond to the prompts as needed and click Finish. To attach the new table to the transformation, navigate to the location of the table in the tree where you stored its metadata. Drag and drop the table onto the process flow diagram and attach the table to the transformation.
  5. Attach a target table to the transformation. (Multiple target tables can be attached to the transformation.)
    Tip
    If you cannot attach the table to the transformation, right-click the transformation and from the menu that is displayed, select Connections. In the User Written Staging Connections dialog box that opens, the Output Node field of the target table should have a value. If the field does not have a value (or displays <none>), double-click the ellipsis (...) in the Output Node field and select the table to which you want to connect. Then click OK. Click OK again to return to the process flow diagram and connect the target table to the transformation.
  6. Right-click the User-Written Staging transformation. From the drop-down menu, select Properties.
    The General tab of the User-Written Staging Properties dialog box appears. The Name field displays the default value of the transformation, User-Written Staging.
    General Tab of the User-Written Staging Transformation
    General Tab of the User-Written Staging Transformation
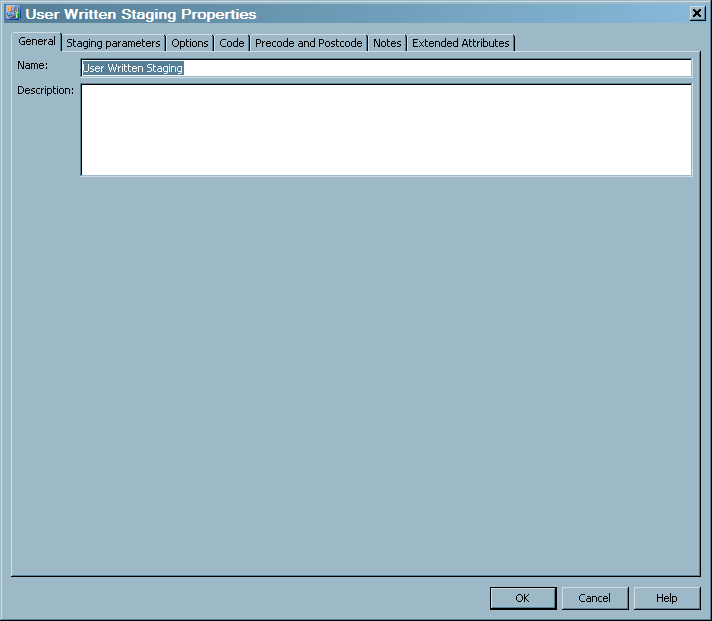
  7. In the Name field on the General tab, enter the name of the transformation if you do not want to retain the default name. The name of the transformation can be no more than 60 characters. It must be unique within the job that contains it. This field cannot be blank.
    The new name of the transformation appears in the box that represents the User-Written Staging transformation in process flow diagram.
    In the Description field, you can enter up to 200 characters of information about the transformation. A value is optional in this field.
  8. On the Staging Parameters tab, you can customize the staging transformation with staging parameters, duplicate data checking parameters, and user-written parameters.
    1. In the left panel of the tab, select Staging.
      Standard Staging Parameters
      Standard Staging Parameters
      You can specify the following information:
      • In the Raw data input file or directory field, enter the location of the file or directory that contains the raw data that is input to your staging transformation.
        Click Browse to open the Select the File or Directory dialog box. In the Look in field, the drop-down list displays the files and directories that are available in the metadata repository to which you are connected. From the drop-down list that is displayed, select the file or directory that contains the raw data that is input to your user-written staging transformation.
        For information about the Raw data input file or directory parameter, see Choose Raw Data Input Type.
      • In the Future Data field, the drop-down list displays the options that are available for handling future data. These options are Accept, Discard, and Terminate. Select the option that you want to use, or use the default value, Discard.
        For information about the Future Data parameter, see Future Data.
      Note: Click the Reset to defaults option at the top of the tab to reset all the Staging parameters to the values that were established when SAS IT Resource Management was installed. Click the Reset option next to any one of these parameters to reset it to the value that was established when SAS IT Resource Management was installed. Also note that Reset to defaults does not reset a parameter that is dependent on another parameter if the parent parameter does not change.
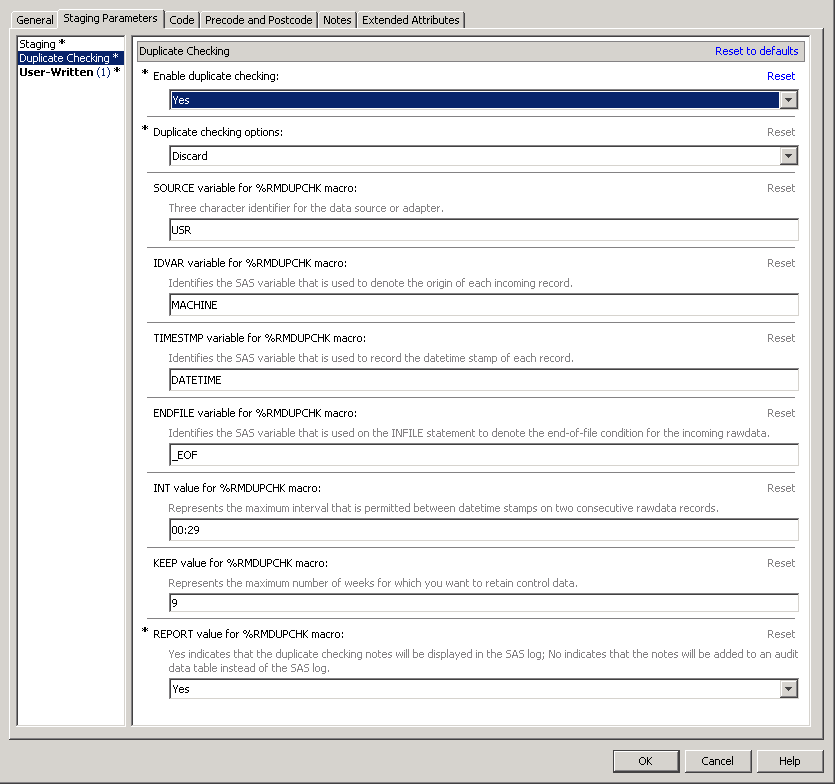
    2. In the left panel of the tab, select Duplicate Checking. To specify these parameters, use the drop-down list in the Enable duplicate checking field to select Yes. The following dialog box appears. If you select No, the duplicate checking parameters are removed from the panel.
      Duplicate Checking Staging Parameters
      Duplicate Checking Staging Parameters
      You can specify the following information, which pertains to the parameters and options that affect how duplicate data checking is performed:
      • In the Duplicate checking options field, you can specify how duplicate data is to be handled.
        The default value is USR. The following values can be selected.
        Discard
        removes duplicates.
        Force
        loads data regardless of whether duplicates are found.
        Terminate
        ends the job if duplicates are found.
        CAUTION:
        Although the job terminates, the resulting staged table might contain data. However, termination of the job indicates an error in processing, and any data in the resulting staged table might be invalid.
      • In the SOURCE variable for %RMDUPCHK macro field, you can specify the data source for this adapter..
        The default value is USR.
      • In the IDVAR variable for %RMDUPCHK macro field, you can specify the name of the SAS variable that identifies the system or machine that generated the input data.
        The default value is MACHINE.
      • In the TIMESTMP variable for %RMDUPCHK macro field, you can specify the name of the SAS variable that contains the datetime stamp. This SAS variable uniquely identifies the time of the event or interval that is being recorded.
        The default value is DATETIME.
      • In the ENDFILE variable for %RMDUPCHK macro field, you can specify the name of the SAS variable that is used as the END= keyword for the SAS INFILE statement that reads the raw data.
        The default value is _EOF.
      • In the INT value for %RMDUPCHK macro field, you can specify the maximum time gap (or interval) that is allowed between the timestamps on any two consecutive records from the same system or machine. If the interval between the timestamp values exceeds the value of this parameter, then an observation with the new time range is created in the control data set. This is referred to as a gap in the data.
        The value for this parameter must be provided in the format hh:mm, where hh represents hours and mm represents minutes. For example, to specify an interval of 14 minutes, use INT=0:14. To specify an interval of 1 hour and 29 minutes, use INT=1:29.
        The default value is 00:29.
        Tip
        For best results, specify an interval that is a little larger than the natural interval of the raw data. For example, if the data is in 10-minute intervals, set INT=00:12. If the data is hourly, set INT=01:02.
      • In the KEEP value for %RMDUPCHK macro field, you can specify the number of weeks for which control data is saved. Because this value represents the number of Sundays between two dates, a value of 2 (the default) results in a maximum retention period of 20 days. This value must be an integer.
        The default value is 9.
      • In the REPORTS value for %RMDUPCHK macro field, you can specify whether to display the duplicate-data checking messages in the SAS log or to save the messages in an audit table. If set to Yes, this parameter causes all the messages from duplicate-data checking to be displayed in the SAS log. If set to No, the duplicate-data checking messages are saved in an audit data table that is stored in the staging library. The name of the audit table is source AUDIT (where source is the 3–character data source code).
        The default value is Yes.
      Note: Click the Reset to defaults option at the top of the tab to reset all the duplicate checking parameters to the values that were established when SAS IT Resource Management was installed. Click the Reset option next to any one of these parameters to reset it to the value that was established when SAS IT Resource Management was installed. Also note that Reset to defaults does not reset a parameter that is dependent on another parameter if the parent parameter does not change.
    3. In the left panel of the tab, select User-Written. The following dialog box appears.
      User-Written Staging Parameters
      User-Written Staging Parameters
      You can specify the following information:
      • In the User written code field, enter the location where your staging code is stored.
        Click Browse to open the Select a File dialog box.
      • In the Generate a macro variable with input table name field, you can choose to generate a macro variable that contains the full table name (libref.table) of the input table. From the drop-down list, select Yes if you want to generate the macro variable. Otherwise, select No.
      • In the Generate macro variables with target table names field, you can choose to generate macro variables that contain the full table name (libref.table) of the target tables. From the drop-down list, select Yes if you want to generate the macro variables. Otherwise, select No.
      • In the Generate a macro with target table options field, you can choose to generate a macro that contains the data set options for each target table. From the drop-down list, select Yes if you want to generate the macro. Otherwise, select No.
      • In the Generate Tabinfo and Varinfo tables field, you can choose to generate code that creates the following tables:
        • tabinfo, which contains all the target tables
        • varinfo, which contains all the columns in all the target tables
        From the drop-down list, select Yes if you want to generate the code. Otherwise, select No.
      • In the Generate a macro to create target table ATTRIB statements field, you can choose to generate a macro that contains attrib statements for each column in the target tables. From the drop-down list, select Yes if you want to generate the macro. Otherwise, select No.
      • In the Generate a macro to create computed columns field, you can choose to generate a macro that contains the computations for any computed columns in the target tables. From the drop-down list, select Yes if you want to generate the macro. Otherwise, select No.
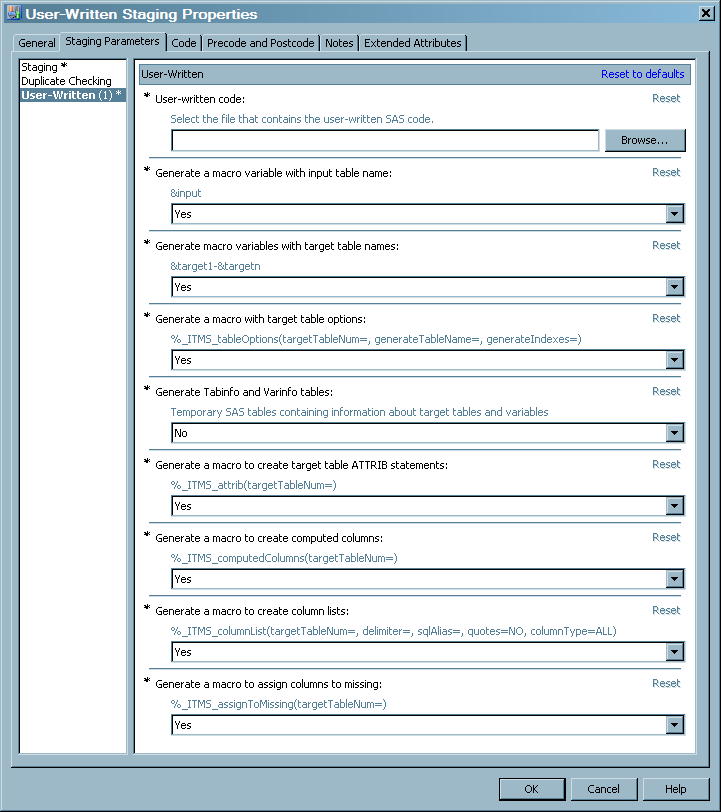
      • In the Generate a macro to create column lists field, you can choose to generate a macro that creates a list of all the columns in the table that can be used as a keep list, a retain list, or any other list of columns that is needed. From the drop-down list, select Yes if you want to generate the macro. Otherwise, select No.
      • In the Generate a macro to assign columns to missing field, you can choose to generate a macro that contains assignment statements to set all columns in the target table to missing. From the drop-down list, select Yes if you want to generate the macro. Otherwise, select No.
      Note: Click the Reset to defaults option at the top of the tab to reset all the User-Written parameters to the values that were established when SAS IT Resource Management was installed. Click the Reset option next to any one of these parameters to reset it to the value that was established when SAS IT Resource Management was installed. Also note that Reset to defaults does not reset a parameter that is dependent on another parameter if the parent parameter does not change.
  9. The remaining tabs on the User-Written Staging Properties dialog box consist of standard SAS Data Integration Studio properties. For information about how to use these properties, click Help on the tab.
  10. Click OK to return to the process flow diagram.
  11. Click Filethen selectSave to save the job.

Delete a User-Written Staging Transformation from a Job

To delete a User-Written Staging transformation from a job, perform the following steps:
  1. From the IT Data Marts tree of SAS IT Resource Management, double-click the job that contains the User-Written Staging transformation. The job opens on the Diagram tab of the Job Editor window.
  2. Right-click the box that represents the User-Written Staging transformation.
  3. From the drop-down menu, select Delete.
  4. Click Filethen selectSave to save the job.

Modify a User-Written Staging Transformation

To modify a User-Written Staging transformation, perform the following steps:
  1. From the IT Data Marts tree of SAS IT Resource Management, double-click the job that contains the User-Written Staging transformation. The job opens on the Diagram tab of the Job Editor window.
  2. Right-click the box that represents the User-Written Staging transformation.
  3. From the drop-down menu, select Properties.
  4. Click the tab that contains the information that you want to modify.
    • On the General tab, you can change the name of the transformation. The name of the transformation can be no more than 60 characters. It must be unique within the job that contains it.
    • On the Staging Parameters tab, you can change the standard staging parameters and the user-written staging parameters. For information about these parameters, see Create a User-Written Staging Transformation.
  5. The remaining tabs on the User-Written Staging Properties dialog box consist of standard SAS Data Integration Studio properties that can also be modified. For information about how to use these properties, click Help on the tab.
  6. Click OK to return to the process flow diagram.
  7. Click Filethen selectSave to save the job.

Rename a User-Written Staging Transformation

To rename a User-Written Staging transformation, perform the following steps:
  1. From the IT Data Marts tree of SAS IT Resource Management, double-click the job that contains the User-Written Staging transformation. The job opens on the Diagram tab of the Job Editor window.
  2. Right-click the box that represents the User-Written Staging transformation.
  3. From the drop-down menu, select Properties.
  4. In the Name field on the General tab, enter the new name of the transformation. The name of the transformation can be no more than 60 characters. It must be unique within the job that contains it.
    The new name of the transformation is displayed in the box that represents the User-Written Staging transformation in process flow diagram.
  5. Click OK to return to the process flow diagram.
  6. Click Filethen selectSave to save the job.