Accessing Raw Data for SNMP
Sources of SNMP Data
In order to read the
raw data from either HP NNM or rrdtool, it is necessary to run Perl
scripts as part of the staging process. This means that Perl must
be installed on the machine that the SAS program runs on, that is,
the SAS Workspace Server, the SAS batch server, or interactive SAS.
The Perl scripts that
are used by the staging code are generated as part of the code generation
of the staging job. This code can be viewed and modified as necessary
in the Code screen of the job.
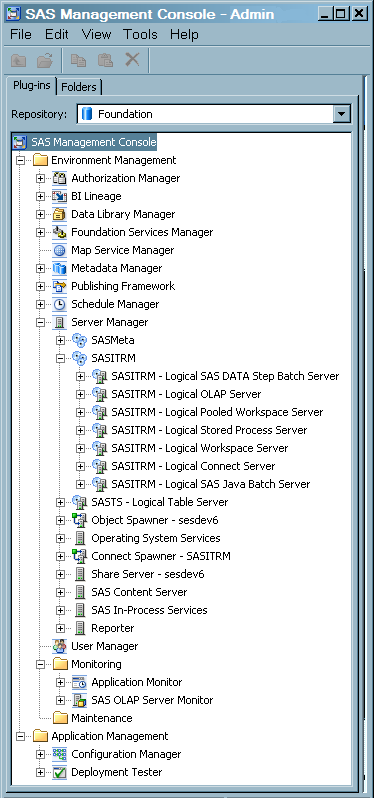
To run these scripts
in batch mode, it is necessary to set the xcmd option for the Batch
server. To do so, change
set USERMODS_OPTIONS= to set USERMODS_OPTIONS=XCMD.
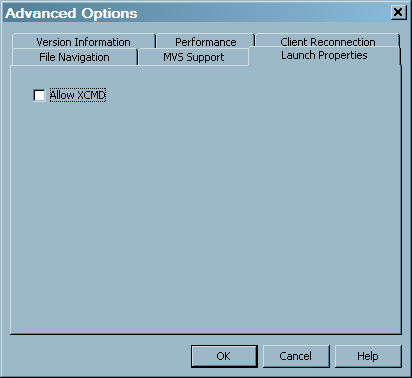
To run these scripts
from within the SAS Workspace server, it is necessary to have the
SAS option XCMD turned on. By default this option is off in the Workspace
server. To turn the option on, perform the following steps:
-
Windows Specifics: To stop your object spawner service, from the Start menu, select Progams
 SASSAS Configuration<configuration-name>Object SpawnerStop. To restart your object spawner service, from the
Start menu, select ProgamsSASSAS Configuration<configuration-name>Object SpawnerStop.UNIX Specifics: To stop and then restart your object spawner service, from the command line, change directories to SAS-config-dir/Lev1/SASMain/ObjectSpawner. Stop the object spawner by issuing this command:
SASSAS Configuration<configuration-name>Object SpawnerStop. To restart your object spawner service, from the
Start menu, select ProgamsSASSAS Configuration<configuration-name>Object SpawnerStop.UNIX Specifics: To stop and then restart your object spawner service, from the command line, change directories to SAS-config-dir/Lev1/SASMain/ObjectSpawner. Stop the object spawner by issuing this command:$ ./ObjectSpawner.sh stop. When you receive a confirmation that the object spawner has stopped, start it again by issuing this command:$ ./ObjectSpawner.sh start. You should receive a confirmation that the object spawner has started.
Extracting Data by Using HP NNM Tools
Versions of HP NNM that are earlier
than HP NNMi 8.x provide two tools that are no longer provided with
the HP NNMi 8.x and later versions of the product. However, if you
have access to earlier releases of the HP NNM product, you can still
use the commands that are discussed in the following section.
Versions of HP NNM that
are earlier than i8.x provide two commands that enable you to extract
SNMP data. The two commands are:
The snmpCollect executable
uses a file called snmpCol.conf to determine the metrics to collect
and the devices from which to gather data.
You can create the snmpCol.conf
file by using either of the following methods.
When the snmpCol.conf file is created, you can run
the snmpCollect command to gather data. You can run the collect as
often as you choose. The command collects a set of files in the location
that you specify. For each metric and interface, two files are generated:
For example, for the metric called ifOctets, and for
interface 3, the ifOctets.3 and ifOctets.3! files are generated. The
SNMP staging code runs the snmpColDump command against these files
to get the rawdata that is to be read and loaded into staged tables.
In order to read the data, the snmpColDump executable requires both
the file that contains the binary data and file that contains the
information about the metrics that are collected.
Tip
The binary data files continue
to accumulate until they are deleted. For best results, these data
files (whose names do not end with "!") should be moved to another
location before staging. The snmpCollect command then creates a new
set of binary files into which the data is to be collected. The files
that contain the information about the metrics (whose names end with
"!") should be copied (not moved) to the other location as well. This
way, the snmpCollect command can continue to use these metrics as
it collects the raw data. The staging code can then read the files
from the location to which they were moved or copied.
Extracting Data by Using the Round-Robin Database Tool (RRDTOOL)
Note: The round-robin database
tool, rrdtool, is a freeware package that is available for download
from Tobias Oetiker. This software is widely used, often in conjunction
with Tobias Oetiker's MRTG package, which is a real-time monitor of
data.
The SNMP adapter reads
only those round-robin databases that contain one round-robin database
for each combination of the device, the network interface to which
the device is connected, and the metric. The data can be gathered
at any interval, and any metrics and devices can be gathered.
In order to produce
the correct set of round-robin databases, SAS IT Resource Management
provides a sample Perl script for data collection and storage in the
round-robin database. This script, called snmpuprd.pl, is available
in the
sasmisc folder. The section
at the top of the script enables you to specify modifications that
control how the data is collected. The Perl script uses the snmphost
and snmpvars files, which are located in the sasmisc folder, to determine which metrics to gather from your devices.
It also uses the snmpwalk command to collect the snmp data. When you
have the script set up correctly, you can use your operating system's
scheduling facility to run the script at the appropriate interval.
Notes about the SNMPWALK Command
The snmpwalk command
is an executable that is available as part of the Net-SNMP package.
This package is available as freeware that you can download from the
Sourceforge.net Web site. The snmpwalk command provides
an easy way to read SNMP data from specified devices.
The SNMP adapter uses
snmpwalk in two places:
-
Staging the data: The SNMP staging transformation provides the ability to collect the non-numeric data at staging time instead of at the normal regular intervals that the rest of the SNMP data is collected. This can be useful for character data that does not change frequently. If you want to collect character data and are using rrdtool to gather your rawdata, then you must collect it at staging time, because rrdtool does not store character data. If you are using HP NNM, you can set it up to gather the character data at regular intervals along with the rest of the data, or you can choose to collect it at staging time.If you want to use the snmpwalk method, go to the Staging Parameters tab of the SNMP transformation's property window. On the Use snmpwalk to gather character data option, select Yes. Then fill in values for the following options:
Working with the ITMS_SNMP_DeviceType Lookup Table
In order to provide
better reporting, the SNMP adapter provides a SAS data table that
enables you to indicate the type of device for each of the devices
for which you are gathering data. This table is located by default
in the SASHELP library, and contains no data. To use this table to
define your device types, perform the following steps from the SAS
IT Resource Management client:
Once this table is populated,
when you run the staging code, the deviceType column in all the SNMP
staging tables will have the correct value from the lookup table.
If a device is not in the deviceType table, then deviceType is set
to "Unknown."
If your devices are
named using a convention (for example, the device type is always the
first part of the name, like router_2123), you can create the deviceType
value programmatically. To do so, change the expression for the deviceType
column in the staged table metadata. By default, the expression for
the deviceType column is:
put(device, ?? $deviceType.)Working with Management Information Base (MIB) Definitions for SNMP Staged Tables
The SAS macro %rmmssnmp
enables the SNMP adapter to read Management Information Base (MIB)
definitions and create the metadata for SAS IT Resource Management
staged tables. This macro enables you to generate staged data from
any MIBs that you have. The SAS macro is available in the SAS autocall
macro library so that you can use it from any SAS session.
To use the macro, you
must first create a job with an SNMP transformation in SAS IT Resource
Management. To do so, perform the following steps:
-
Specify the parameters for the %rmmssnmp macro. For information, see Introduction to the Macros in SAS IT Resource Management.