Defining the Environment

Overview

Before the SAS IT Resource Management Adapter for SAP is installed, complete the following steps to prepare the environment:
  • Define users in SAS Management Console.
  • Define an SAP library and an SAP server in SAS Management Console.
  • Test the SAP connection to SAS Data Integration Studio.
  • Create a directory for administrative data.

DefineUsers

To define a user for the SAS IT Resource Management Adapter for SAP, complete the following steps:
  1. Open SAS Management Console.
  2. Select Foundation in the Repository field to connect to the SAS Metadata Server at the Foundation level. You must have administrator access to complete this task.
    SAS Management Console
    SAS Management Console
  3. Right-click User Manager in the navigation tree, and then select Newthen selectGroup.
    SAS Management Console: User Manager
    SAS Management Console User Manager
  4. In the New Group Properties dialog box, enter SAPUsers in the Name field.
    New Group Properties
    New Group Properties
  5. Select the Members tab. Select SAS Demo User in the Available Members box.
  6. Click the single arrow button Right arrow to move the selected member to the Current Members box.
    SAP USERS Properties: Members Tab
    SAP USERS Properties: Members Tab
  7. Select the Groups and Roles tab. Select Metadata Server: Operation in the Available Groups and Roles box.
  8. Click the single arrow button Right arrow to move the selected member to the Member of box.
    SAP USERS Properties: Groups and Roles Tab
    SAP USERS Properties: Groups and Roles Tab
  9. Select the Accounts tab. Click New.
    SAP Users Properties: Accounts Tab
    SAP Users Properties: Accounts Tab
  10. In the Edit Login Properties dialog box, complete the following steps:
    • Enter the user ID and password for the SAP server.
    • Select SAPAuth from the Authentication Domain menu.
      If this option is not already available on the menu, click New, enter SAPAuth as the name of the new authentication domain, and enter a short description. Click OK to save the new authentication domain.
    • Click OK to save the new login properties.
    • Click OK to save the new group properties.
    Edit Login Properties
    Edit Login Properties
  11. In the SAS Demo User Properties dialog box, select the Groups and Roles tab. Select Metadata Server: Operation in the Available Groups and Roles box. Then, click the arrow to move the selected member to the Member of box.
    SAS Demo User Properties
    SAS Demo User Properties

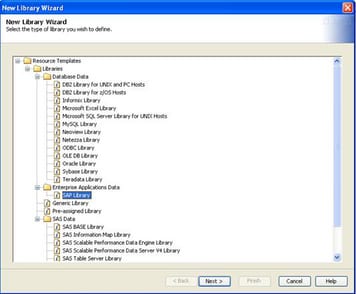
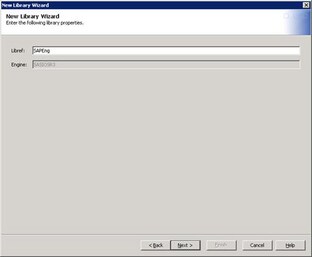
Define an SAP Server and an SAP Library

When you have only one SAP Server defined, defining an SAP library for the server is not required. Library is automatically assigned to the server, once you import the package files into the SAS IT Resource Management. However, it is mandatory to define SAP libraries, when there are multiple servers and you need to extract data from specific servers. For example, when you need to extract data from a specific server, you are required to enter the SAP library of that server in the preprocglobal.sas program.
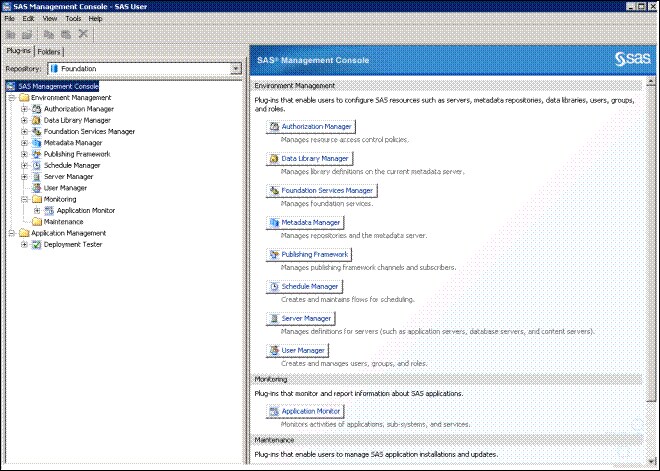
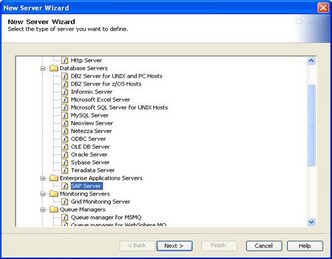
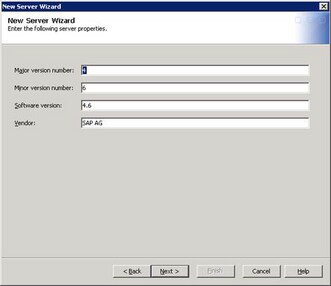
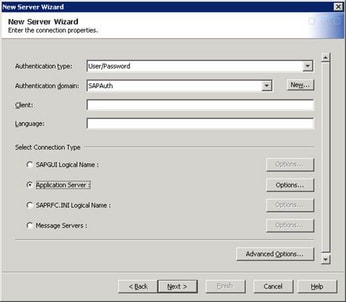
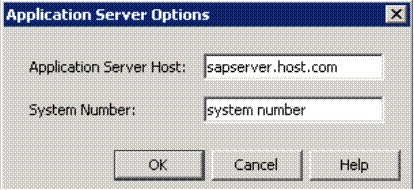
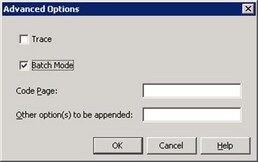
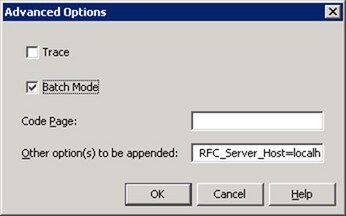
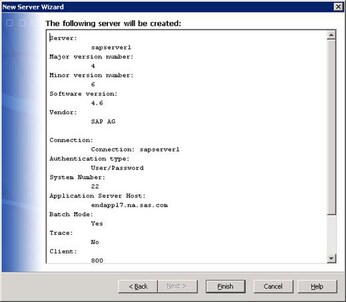
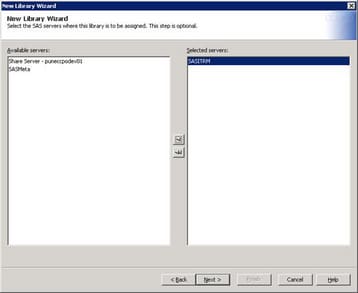
To define an SAP server for the SAS IT Resource Management Adapter for SAP, complete the following steps:
  1. Open SAS Management Console.
  2. In the Repository field, select Foundation, or select a repository that is solely dependent on the Foundation repository.
    This connects to the metadata server at the foundation level.
  3. Right-click Server Manager and select New Server.
    The New Server Wizard appears.
  4. Select SAP Server from the Enterprise Applications Servers folder.
  5. Click Next to name the new SAP library.
    New Server Wizard
    New Server Wizard
  6. Enter a name and description for the server. Click Next.
  7. Enter the version numbers for your SAP software.
    These values are optional.
  8. Click Next.
    Enterprise Applications Servers SAP Server
    Enterprise Applications Servers - SAP Server
  9. Select SAPAuth from the Authentication Domain menu. Select the connection type that corresponds to a normal SAP GUI connection for your system.
    New Server Wizard: Connection Properties
    New Server Wizard: Connection Properties
  10. Click Options for your selection. The Application Server Options dialog box appears.
  11. Specify the RFC server host and system number. Click OK.
    Application Server Options
    Application Server Options
  12. Click Advanced Options in the New Server Wizard dialog box.
    If you have defined batch servers or processes, specify some of the advanced options that are available.
  13. Select Batch Mode and click OK.
    Advanced Options
    Advanced Options
  14. For a z/OS environment, specify the RFC Server host name (where your RFC server is available) and RFC server port in the field Other option(s) to be appended.
    Advanced Options
    Advanced Options
  15. Click Next, in the New Server Wizard.
  16. Review the information and click Finish.
    This takes you to the main screen of the SAS Management Console, where you can view in the Servers list, the server that you have just defined.
    New Server Wizard: Summary of Specifications
    New Server Wizard: Summary
    To define an SAP library for the SAS IT Resource Management Adapter for SAP, complete the following steps:
  17. Expand Data Library Manager in the navigation tree.
  18. Right-click Libraries and select New Library.
    The New Library Wizard appears.
  19. Select SAP Library from the Enterprise Applications Libraries folder. Click Next.
    New Library Wizard
    New Library Wizard
  20. Enter a name and description for the library. Click Next.
    New Library Wizard
    New Library Wizard
  21. Select the required SAS SASITRM server.
    New Library Wizard: Server Selection
    New Library Wizard: Server Selection
    The value SAPEng appears in the Libref field. This is the default value that the imported metadata uses. You can give any other name and description that uniquely identifies the SAP server that you have created.
  22. Click Next.
    New Libref Wizard: Libref Name
    New Libref Wizard: Libref Name
  23. In the Database Server field, select a database server that contains parameters connecting to the SAP server.
  24. If an appropriate database server is not already available in the menu, complete steps 1-16 to create one. Click Next.
    New Library Wizard: Database Server
    New Library Wizard: Database Server
  25. Click Finish.
    Library Properties
    Library Properties

SAS RFC Server (Only for SAS/ACCESS Interface to R/3 for z/OS)

A SAS RFC server was needed in the previous releases of SAS IT Resource Management Adapter for SAP, to enable communication between the SAS/ACCESS Interface to R/3 and the SAP system. In this release of SAS IT Resource Management Adapter for SAP, SAS/ACCESS Interface to R/3 communicates directly with the SAP system, so that a SAS RFC server is not required. However, a SAS RFC server is needed for the LIBNAME engine on z/OS. SAS/ACCESS Interface to R/3 for z/OS includes RFC servers for z/OS, AIX, and Windows. The SAS RFC server is no longer supported for the SAS/ACCESS Interface to R/3 for Windows and UNIX. There is no Unicode RFC server on z/OS. You need to use the Unicode RFC server on one of the other supported platforms. Currently, the Unicode server for Windows and AIX is delivered with SAS/ACCESS to R/3 on z/OS.
You need to use the Unicode RFC server on AIX or Windows to connect the Unicode SAP system from z/OS environment. For this, you need to set up AIX RFC Unicode server on AIX box. Then provide the host name and port of the AIX RFC server when you create the SAP server on z/OS.
For more information about running the RFC server on z/OS, see the chapter entitled “Installing SAS/ACCESS Interface to R/3 Software on z/OS” in the Post-Installation Instructions for SAS/ACCESS 4.4 Interface to R/3 available at http://support.sas.com/.

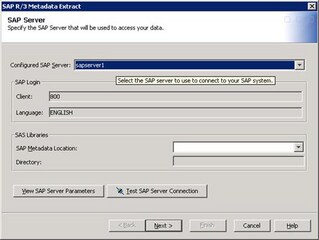
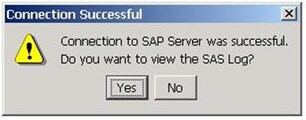
Test the SAPConnection

  1. Open SAS Management Console.
  2. Open the Connection Profile for the user.
    SAS Management Console Designer Box
    SAS Management Console Designer Box
  3. Select Toolsthen selectExtract From R3.
    The SAP R/3 Metadata Extract dialog box appears.
    SAP R/3 Metadata Extract
    SAP R/3 Metadata Extract
  4. In the Configured SAP Server field, select the SAP server that you defined in SAS Management Console.
  5. Click Test SAP Server Connection.
    If the connection is successful, then the following message appears:
    Connection Successful Message
    Connection Successful Message
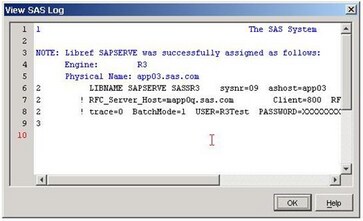
    Note: If the connection is not successful, the SAS log indicates a problem. For example, RFC server errors might indicate that the RFC server is not running, or an invalid user ID might indicate that the password is incorrect. For more information about troubleshooting connection problems, see the SAS/ACCESS Interface to R/3 installation documentation that is included in your installation package.
  6. Click Yes.
    The View SAS Log dialog box displays the LIBNAME statement that is generated using the specified parameters.
  7. Click OK to exit the SAS log.
    SAS Log Example
    SAS Log Example
  8. In the SAP R/3 Metadata Extract dialog box, click Cancel.
    Note: Before you test the SAP connection, create the SAP library that is associated with the SAP server. You should test this connection after you have imported the package files for the first time. This ensures that the SAP library is automatically available for testing the connection. If you want to test the SAP connection for other SAP servers, then you need to create SAP libraries for the corresponding SAP servers.

Create Directories for Administrative and Raw Data

  1. Create the ITManagementAdapterSAP folder on the SAS ITRM Application Server at the following location:
    X:\SAS\<ConfigDir>\Lev1\SASITRM\Data
  2. Create two directories, one for the administrative data and another for the raw data at the following location:
    X:\SAS\<ConfigDir>\Lev1\SASITRM\Data\ITManagementAdapterSAP
After you create the two directories, the paths should be:
  • X:\SAS\<ConfigDir>\Lev1\SASITRM\Data\ITManagementAdapterSAP\Admin
  • X:\SAS\<ConfigDir>\Lev1\SASITRM\Data\ITManagementAdapterSAP\Rawdata
Note: The above path is for windows. While working in a z/OS environment, you need to create the ITManagementAdapterSAP, Admin, and Rawdata folders in the following location.
<ConfigDir>/Lev1/SASITRM/Data/