Post-Installation Configuration
Overview
After you install SAS
Federation Server, you might need to perform additional configuration
steps before you can use SAS Federation Server. At the end of the
installation, the SAS Deployment Wizard produces an HTML document
named Instructions.html. If your server tier and middle tier are hosted
on separate machines, there is an Instructions.html file for each
machine. The Instructions.html file is located in
SAS\Config\Lev#\Documents\.
Here is an outline of tasks that require attention:
-
Verify that all installation and configuration steps in the Instructions.html file have been completed.
-
Create users, groups, and roles.
-
(Optional) Specify an encryption level for SAS Federation Server.
SAS Metadata Server
User Requirements and Roles
To access SAS Federation
Server Manager, users might require group membership that includes
assignment of specific roles.
-
A non-administrator user requires the Federation Server Manager: Operation role.
-
An administrator object requires membership to the SAS Federation Server Administrators group, with the ManageMemberMetadata permission. The Federation Server Manager: Operation role is assigned by default.
-
The SAS Federation Server System User account that is created at installation is sasfedadm. This account is a member of the SAS Federation Server Administrators group.
SAS Federation Server Administrators
A user becomes an administrator
when their account is added to the Federation Server Administrators group
in SAS Metadata Server. This action grants the ADMINISTER privilege
to the user object. Only the SAS Federation Server System user, sasfedadm,
can perform this action, as well as the SAS Metadata Administrator
(sasadm).
Only the system user
has the authority to grant or revoke the ADMINISTER privilege through
the use of administration DDL. The ADMINISTER permission is available
on the server object only.
Specify Server Encryption Level
Use the following procedure to specify or change the encryption level for a particular
SAS Federation Server.
-
Using SAS Management Console, locate your federation server object by expanding Environment Manager
 Server ManagerFederation Server - hostname -
logical server.
Server ManagerFederation Server - hostname -
logical server.
-
Expand the logical server entry and select the server definition that you want to change encryption for. The Connections tab displays the current connections defined for the selected server.
-
On the Connections tab, select a connection and right-click. Select Properties from the drop-down menu.
-
Select the Options tab and select Advanced Options.
-
Select the Encryption tab and select an option from the Server encryption algorithm list menu.
-
Click OK to exit the Advanced Options dialog box, and click OK to close connection properties.
-
Restart SAS Federation Server to update the server encryption algorithm.
Shared Login Accounts
About Shared Logins
Shared logins consist
of a shared login key, the login account, and the users or groups
who are members of the (shared) login account. The SAS Federation
Server administrator creates and controls the shared logins for SAS
Federation Server.
When using a shared login to authenticate to a data source, users do not need to know
the credentials of the shared login. The shared login retrieves credentials for the
user who is logged on and provides the credentials to SAS Federation Server. In turn,
the server connects the user to the database through the appropriate data service
or data source name (DSN).
Outline of Shared Login Tasks
The implementation of
shared logins has changed in SAS Federation Server 4.2. Here is a
summary of the tasks:
-
Create a shared login key for SAS Federation Server using administrative DDL or in SAS Federation Server Manager in the properties of a federation server object. The shared login key is case sensitive. The key that is defined in SAS Federation Server must match the key that is part of the shared login definition in the SAS Metadata Server.
-
Create a shared login account (group) in SAS Metadata Server using SAS Management Console. The shared login account includes the login to be shared and its domain.
-
Add consumers of the shared login as members of the shared login account. Consumers are SAS Federation Server user accounts or groups. You should never use the actual shared login group as a consumer group in a DSN.
-
Create a data service for the applicable data source. In the DSN, specify that the data will be accessed with a shared login.
About the Authentication Domain
When establishing connection
to the SAS Federation Server, the following logic is used to find
the proper login:
-
If connecting with a DSN configured to use a personal or group login, SAS Federation Server uses the authentication domain associated with the data service to look up a login for the user.
-
If connecting with a DSN configured to use a shared login, SAS Federation Server uses the authentication domain associated with the data service and appends the domain with a suffix of “
@<shared login
                                          key>
” to look up a login for the user.
Creating a Shared Login
The tasks presented
in the following topics outline the basic steps to create a shared
login for SAS Federation Server:
-
Set a shared login key (SAS Federation Server Manager).
-
Create the shared login account (SAS Management Console).
-
Create a data service and DSN for the data source (SAS Federation Server Manager).
Set a Shared Login Key
The shared login key is used when configuring an authentication domain in SAS Metadata
Server. The shared login key is case sensitive. the following
steps show how to set a shared login key with SAS Federation Server Manager:
-
Locate the federation server object in the tree, and log on to the server if prompted to do so.
-
Select Action MenuProperties in the upper left corner.
-
Click the Security tab and enter the shared login key.
-
Click OK to exit the properties dialog box.
Tip
You can also use administration
DDL to set a shared login key: ALTER SERVER {OPTIONS (SHAREDLOGINKEY name-of-key)
}Create a Shared Login Account
The shared login account
is actually a group that serves as the shared login account, so the
name of the group should reflect that (reference step 4a below).
-
Log on to SAS Management Console
-
On the Plug-ins tab, select User Manager.
-
Right-click and select NewGroup.
-
In the New Group Properties dialog box:
-
On the General tab, enter a name for the shared login (for example, Oracle Shared Login for FedServer).
-
On the Members tab, add users and groups who will use the shared login.
-
On the Accounts tab, add the account and password.
-
Select New for Authentication Domain.
-
Enter an Authentication Domain name using this format:
<data_service_domain>@<shared_login_key>
For example, if the domain for the data service is OracleAuth and the shared login key isFSKey1, then the shared login domain must beOracleAuth@FSKey1. The shared login key is case sensitive and must match the shared login key that was set in SAS Federation Server Manager. -
Select Outbound only and Trusted only for the domain.New Authentication Domain Dialog Box
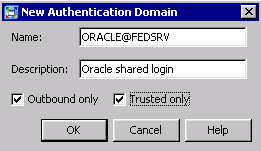
Outbound only: An outbound domain is used only to provide SAS applications with access to external resources, such as a third-party vendor database.Trusted only: The trusted user is a privileged service identity that can act on behalf of all other users. A login in a trusted domain can be accessed only by a trusted user. -
-
-
On the Authorizations tab, ensure that the SAS Administrators group has these permissions:
-
ManageMemberMetadata
-
ManageCredentialsMetadata
-
ReadMetadata
-
WriteMetadata
-
Add Members to the Shared Login Group
Once the shared login
is configured, you must add users and groups as consumers of the shared
login. Use the following procedure in SAS Management Console to add
a user or group to a shared login.
-
On the Plug-ins tab, select User Manager.
-
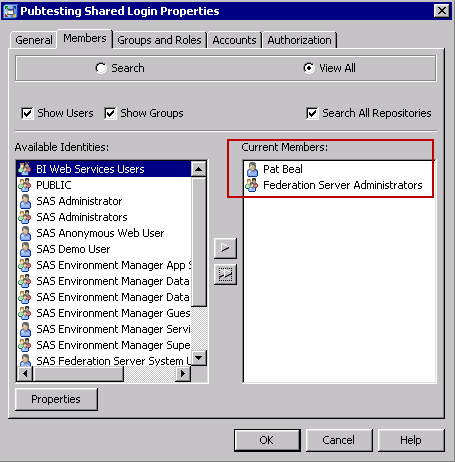
Locate the shared login object, right-click, and select Properties.
-
In the Properties dialog box, on the Members tab, add users and groups who will use the shared login.Shared Login Consumer Membership
-
Click OK when you are finished.
Create a Data Service and DSN
When you create a data service, a DSN with the same name is automatically created
for you. Use SAS Federation Server Manager
to perform the following task.
-
Select a federation server object in the tree, and log on to the server if you are prompted
-
Select ActionNew Data Service, or click the New Data Service icon
 on the toolbar.
-
In the Identification dialog box, enter the name of the data service and click Next to continue.
-
In the Authentication Domain dialog box, select an Authentication Domain from the list of available domains and click Next to continue.Defining the Data Service Authentication Domain
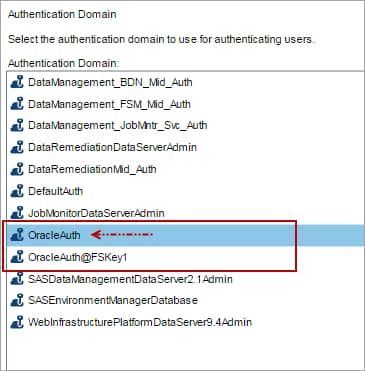 CAUTION:Select a stand-alone data source domain. Do not select the domain with the shared login key that was created in SAS Metadata Server. When the DSN is set to use a shared login, SAS Federation Server appends the selected domain with @ and the shared login key and verifies that
data
                                          source@<shared login key>
exists in SAS Metadata as a valid authentication domain that includes user and password account information. -
In the Summary dialog box, verify the settings and click Finish.
Set the Shared Login Indicator in the DSN
-
Select the Data Source Names tab affiliated with the Oracle data service that you just created. You should see a DSN that is named for the new data service.
-
Select the Action menu
 , select Properties, and
click Next until you reach the Access dialog
box.
, select Properties, and
click Next until you reach the Access dialog
box.
-
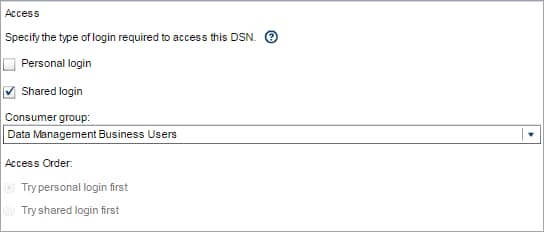
In the Specify the type of login required to access this DSNfield, select the Shared login check box.Shared Login Specification for DSN Access
-
From the Consumer group drop-down list, select a group if necessary.Note: The Consumer group identifies which shared login should be used if a conflict occurs for a user. The Consumer group should be a group that is directly or indirectly a member of the shared login.
-
Click Next, Next, Next, and Finish.
ODBC Wire Protocol Branded Drivers
About the ODBC Wire Protocol Drivers
SAS Federation Server installs
version 7.1 set of wire protocol ODBC drivers for several databases.
The drivers are installed at
[drive]:/Program
                           Files/DataFlux/ODBC/7.1
. The database and database
connection must also be configured as an ODBC data source.
Windows ODBC Configuration
To add an ODBC data
source, use the ODBC Data Source Administrator in
Microsoft Windows. Use the following procedure to set up a new ODBC connection:
-
Click StartControl Panel.
-
Double-click Administrative ToolsData Sources
(ODBC).
Note: In Windows 7, the view of the Control Panel can vary. If you do not see Administrative Tools when you open the Control Panel, click System and Security to access Administrative Tools, Data Sources (ODBC).
-
Click Add.
-
In the ODBC Data Source Administrator window, select the Drivers tab to display the wire protocol drivers.
-
Select a driver and click OK.
-
In the ODBC Driver Setup dialog box, enter the Data Source Name, Description, and other configurations specific to your data source. These values are required, and can be obtained from your database administrator.
UNIX ODBC Configuration
SAS Federation Server includes
an ODBC configuration tool, dfdbconf, that
is used to configure the ODBC wire protocol drivers. The utility is
located in the
/bin directory of the
SAS Federation Server installation path. The options are A –Add,
D –Delete, and X – Exit.
To add an ODBC data
source:
-
From the root directory of SAS Federation Server installation, run:
./bin/dfdbconf. -
Select
Ato add a data source. -
Select a template for the new data source by choosing a number from the list of available drivers.
-
Set parameters for the driver as you are prompted to do so. The new data source is added to the
odbc.inifile.
See Configuring ODBC Connections for additional configurations required for ODBC in an UNIX
environment.
Using the SAS Federation Server Drivers
Before configuring the
SAS Federation Drivers, you must set environment variables. See Setting Environment Variables for information to set environment variables for your particular
data source.
When you are ready to configure your federation server driver, see the SAS
Federation Server Driver Reference Database Functionality and Driver Performance, which provides the connection options
for your data source.
Copyright © SAS Institute Inc. All Rights Reserved.
Last updated: March 6, 2018