Getting Started with Time Series Forecasting
To illustrate how you can save your work between sessions, in this section you will exit and then re-enter the Forecasting System.
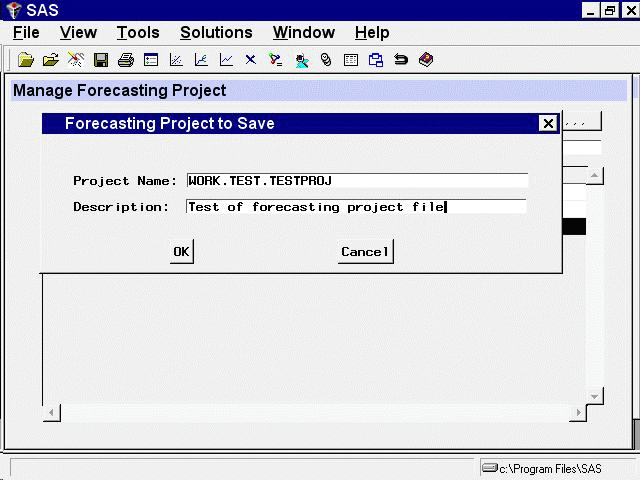
From the Manage Forecasting Project window, select File and Save as. This opens the Forecasting Project to Save window. In the Project Name field, type the name WORK.TEST.TESTPROJ. In the Description
field, type "Test of forecasting project file." The window should now appear as shown in Figure 46.25.
Select the OK button. This returns you to the Project Management window and displays a message indicating that the project was saved.
Select Close from the toolbar or from the File menu to return to the Time Series Forecasting window. Now select the Exit button. The system
asks if you are sure you want to exit the system; select Yes. The forecasting application now terminates.
Open the forecasting application again. A new project name is displayed by default.
Now restore the forecasting project you saved previously. Select the Browse button to the right of the Project field. This opens the Forecasting Project File Selection window, as shown in Figure 46.26.
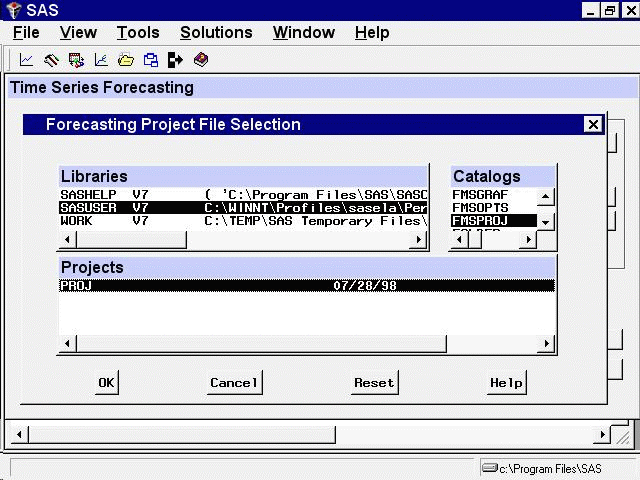
Select the WORK library from the Libraries list. The Catalogs list now shows all the SAS catalogs in the WORK library.
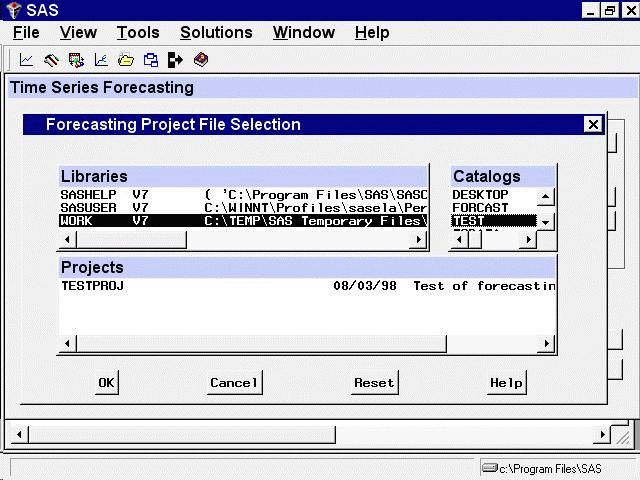
Select the TEST catalog. The Projects list now shows the list of forecasting projects in the catalog TEST. So far, you have created only one project file, TESTPROJ; so TESTPROJ is the only entry in the Projects list, as shown in Figure 46.27.
Select TESTPROJ from the Projects list and then select the OK button. This returns you to the Time Series Forecasting window.
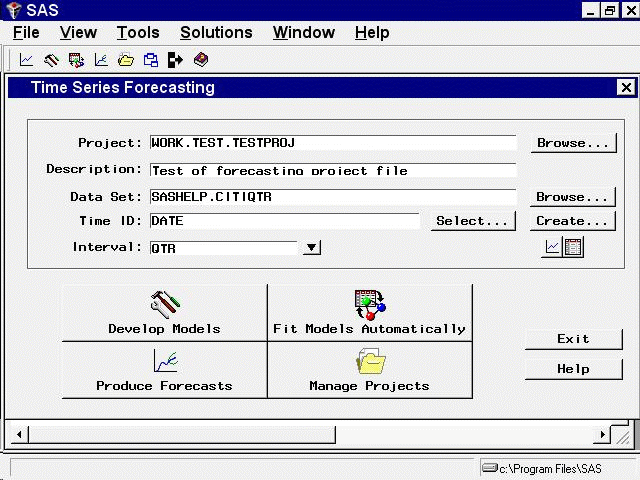
The system loads the project information you saved in TESTPROJ and displays a message indicating this. The Project field is now set to WORK.TEST.TESTPROJ, and the description is the description you previously gave to TESTPROJ, as shown in Figure 46.28.
If you now select the Manage Projects button, you will see the list of series and forecasting models you created in the previous forecasting session.