Adding a CASE Expression
Problem
You want to create a CASE expression to incorporate conditional processing into an
SQL query contained in a SAS Data Integration Studio job. The CASE expression can be added to the following parts of a query:
-
a SELECT statement
-
a WHERE condition
-
a HAVING condition
-
a JOIN condition
Tasks
Add a CASE Expression to an SQL Query in the Designer Window
Perform the following steps to add a CASE expression
to the SQL query in the Designer window:
Note that
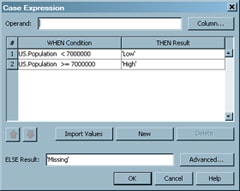
the Operand field is blank. You can specify the operand only when the conditions in the CASE
expression are all equality tests. The expression in this sample query uses comparison
operators. Therefore, the US.Population column name must be entered for each WHEN
condition in the expression. In the sample query, the CASE expression is added to
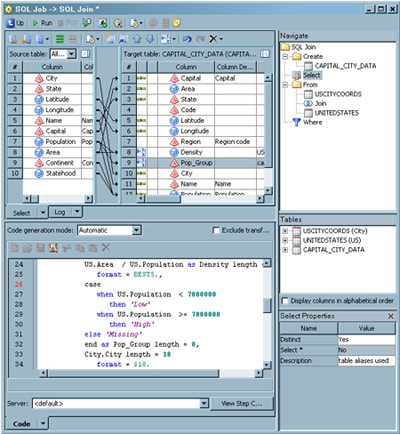
a Pop_Group column that has been added to the target table. The following display depicts the Select tab.
Note that
the Population column in the Source table field on the Select tab is mapped to both
the Population and the Pop_Group columns in the Target
table field. The second mapping, which links Population
to Pop_Group, is created by the CASE expression described in this
topic.
Note: Make sure that
the option in the Select* field of the Select
Properties pane is set to No. The CASE expression is not included in the SQL SELECT statement
when this option is enabled.
Copyright © SAS Institute Inc. All rights reserved.

