Verify the Installation
Overview
After the installation
and configuration is complete, you will want to verify your deployment.
To verify that SAS Enterprise Miner is operational, start the SAS
Enterprise Miner client, create a project, create a diagram, and run
a node.
Starting SAS Enterprise Miner
For an installed client
on the Windows operating system, the Start menu
will contain a SAS folder that includes a shortcut to SAS
Enterprise Miner Client 14.2 or SAS Enterprise
Miner Workstation 14.2.
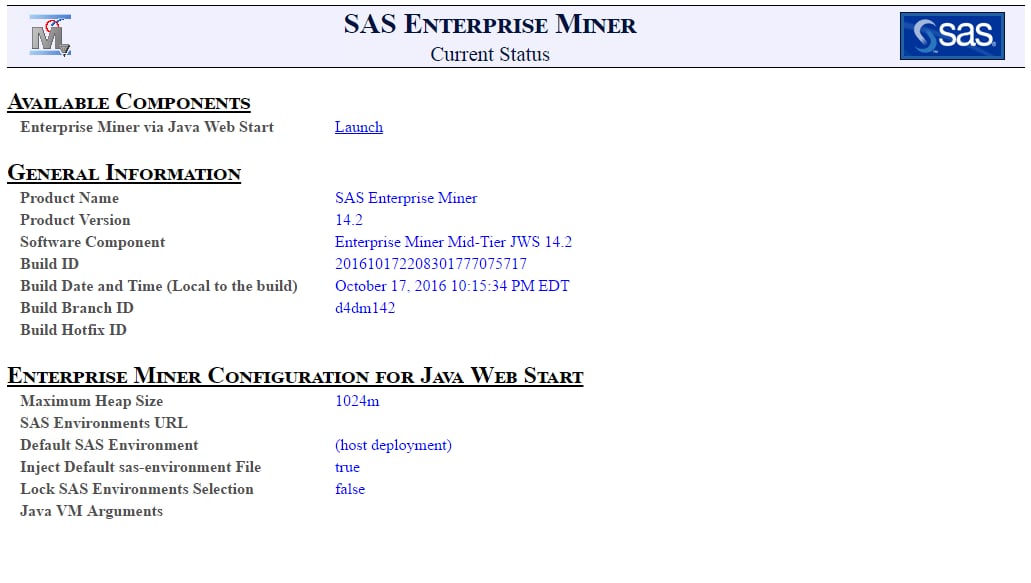
To start the SAS Enterprise
Miner 14.2 client using Java Web Start, open the SAS Enterprise
Miner Status page. That page will be similar to the following:
http://myserver.mynet.mycompany.com:80/SASEnterpriseMinerJWS/Status.
If you are using Java Web Start, then you need to install a third-party
JRE.
Note: You will replace myserver.mynet.mycompany
with the URL to the server that SAS Enterprise Miner was installed
on.
Select the Launch link
to start Java Web Start to load and run the SAS Enterprise Miner 14.2
client.
Run SAS Enterprise Miner Client 14.2
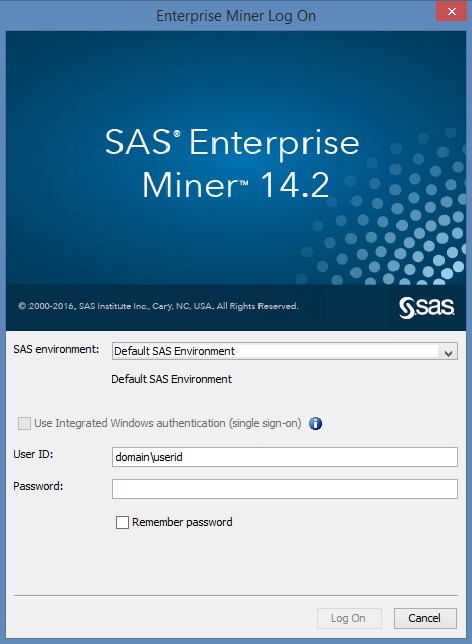
Log on to SAS Enterprise
Miner using the Product Administrator, first user, or any other SAS
Enterprise Miner account that you have created. In most cases, the Enterprise
Miner Log On window will resemble the image shown below.
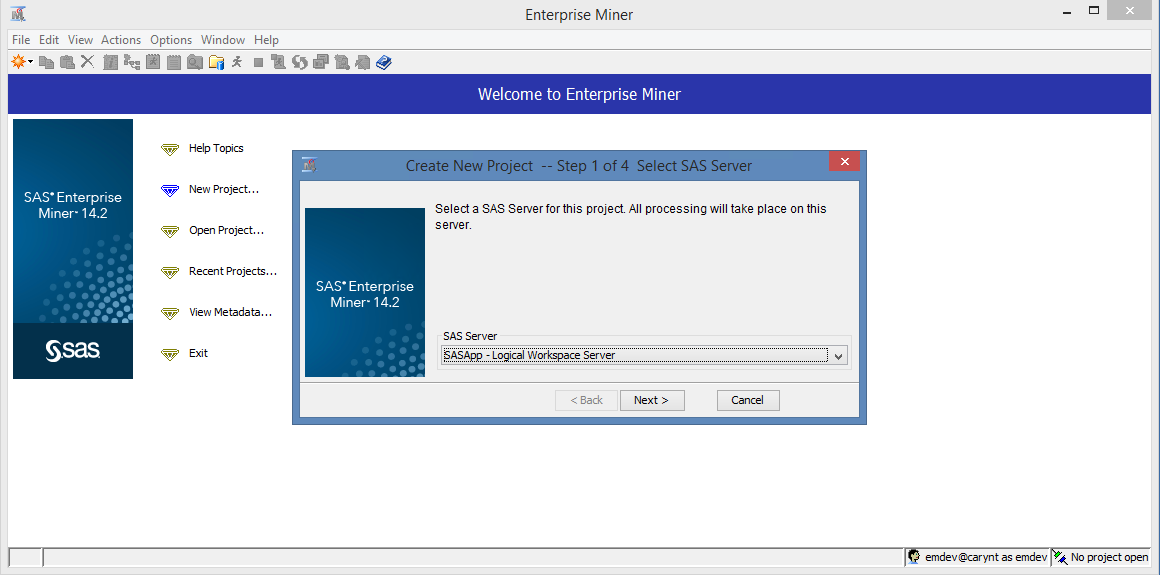
In the SAS
Enterprise Miner window, select New Project.
In the Create
New Project window, accept the default SAS
Server and click Next.
In the Project
Name text box, enter
Test1.
In the SAS Server Directory text box, enter
the path to a folder that is accessible by your account from the server
machine. This folder will contain your project folders and files.
For testing and verification, you can use C:\Temp.
You can use the Browse button to navigate
to your file system and choose a more appropriate folder. For example,
you can use C:\EMProjects\userid. Click Next.

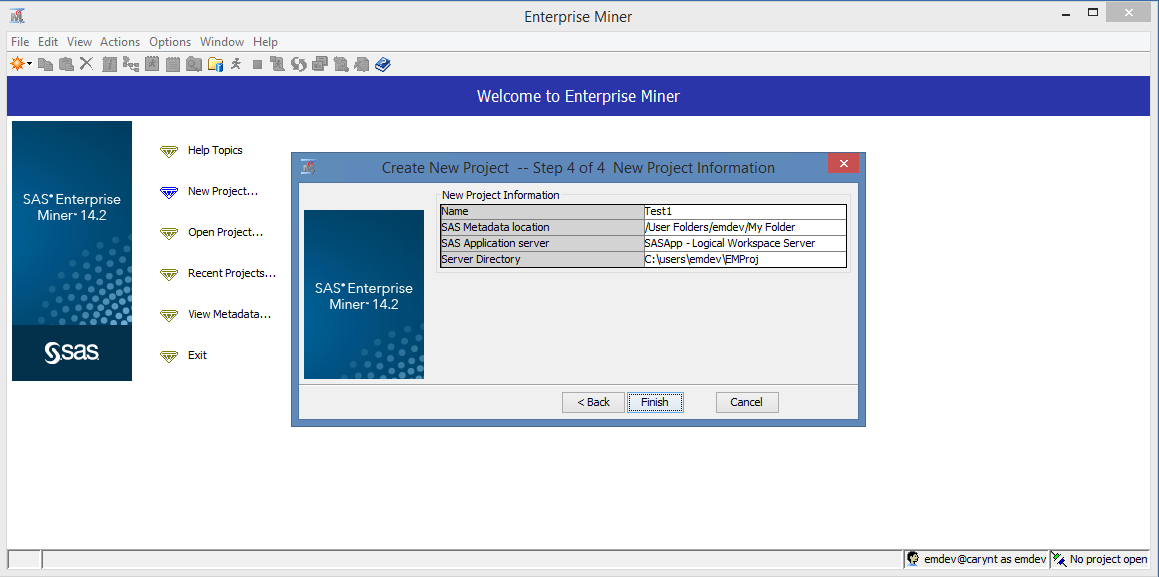
The SAS
Folder Location is where the project metadata is saved.
For verification purposes, accept the default location and click Next.

The final step of the
New Project Wizard displays the New Project Information,
which reviews the information given in the previous windows. Click Finish.
For a more in-depth tutorial on how to create a new project, see the
SAS Enterprise Miner help documentation.
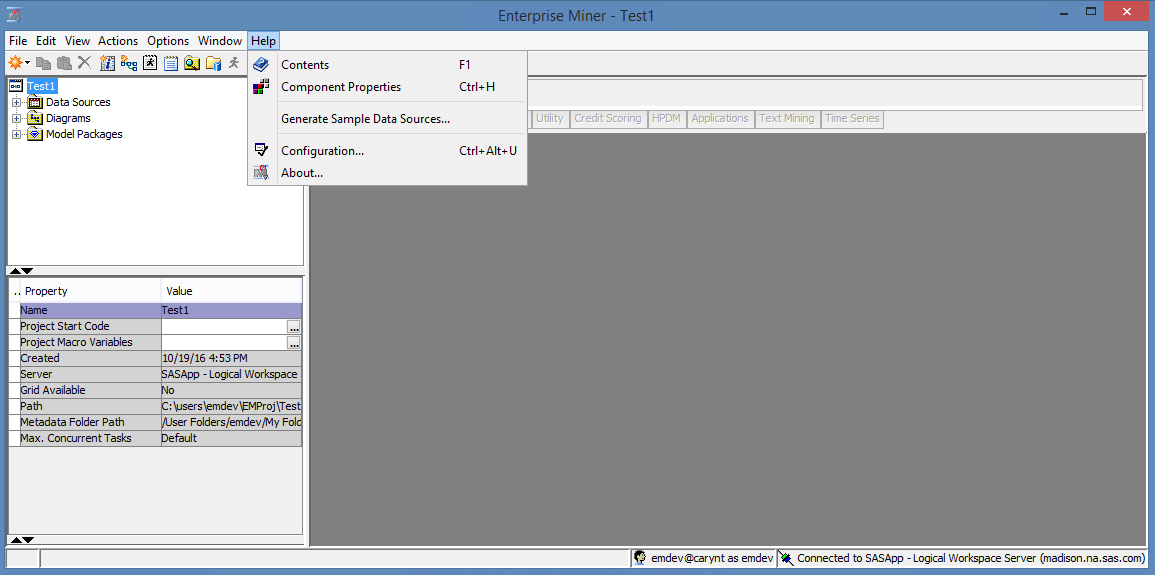
In the Enterprise
Miner — Test 1 window, select Help Generate Sample Data Sources.
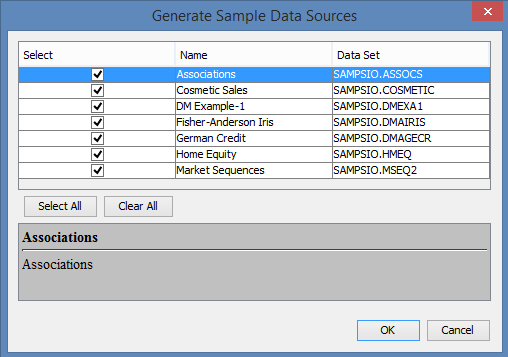
In the Generate
Sample Data Sources window, click OK.
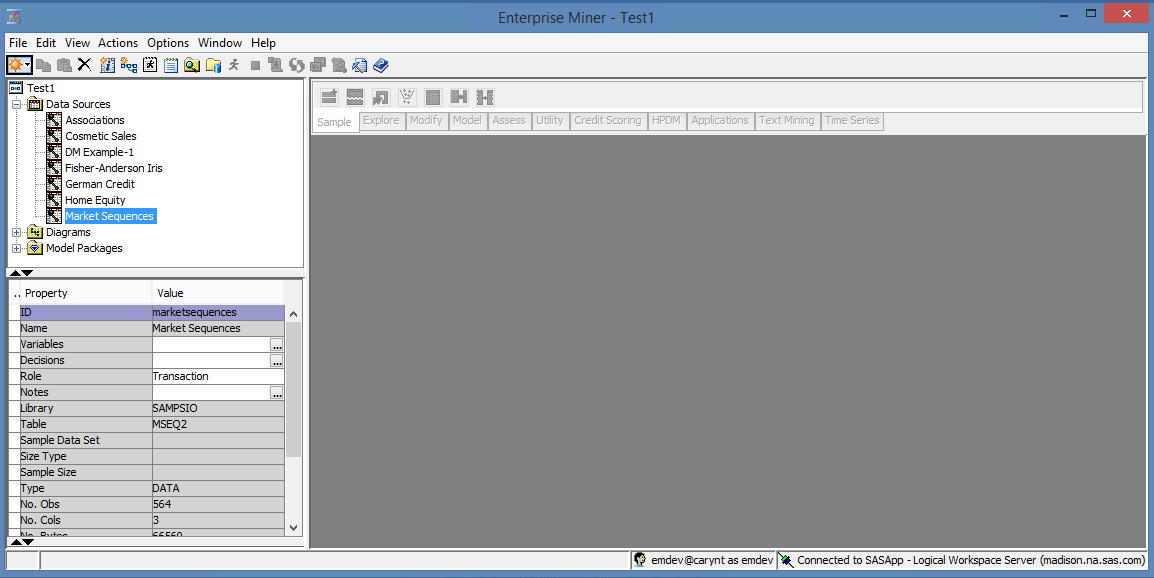
In the Project Panel,
you should see the data sources that were created.
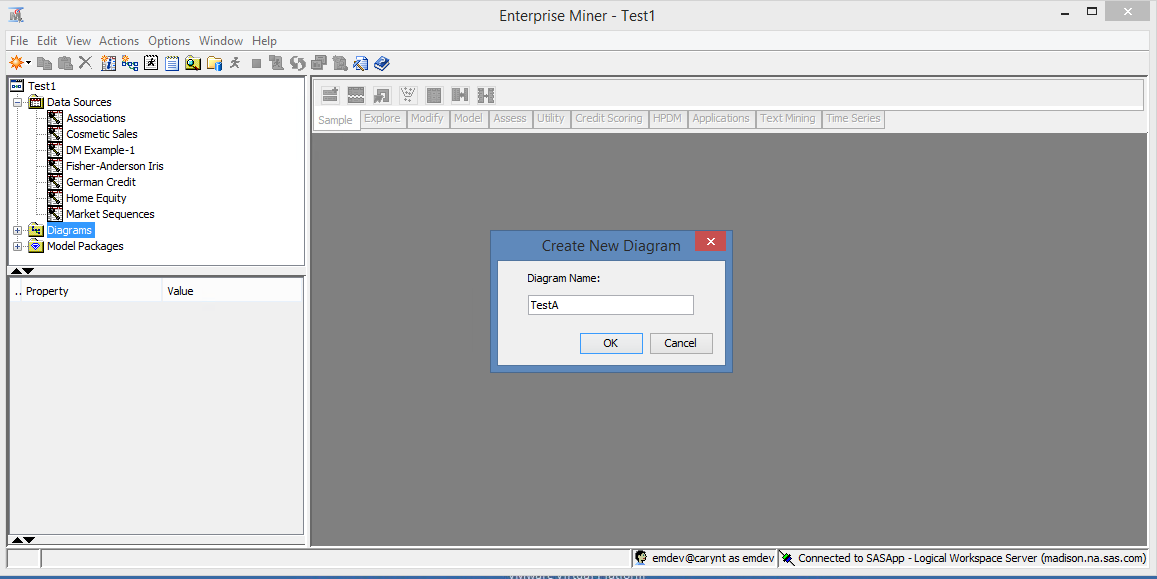
In the Project Panel,
right-click DiagramsCreate
Diagram . In the Create New
Diagram window, enter
TestA and
click OK. A new project diagram opens.
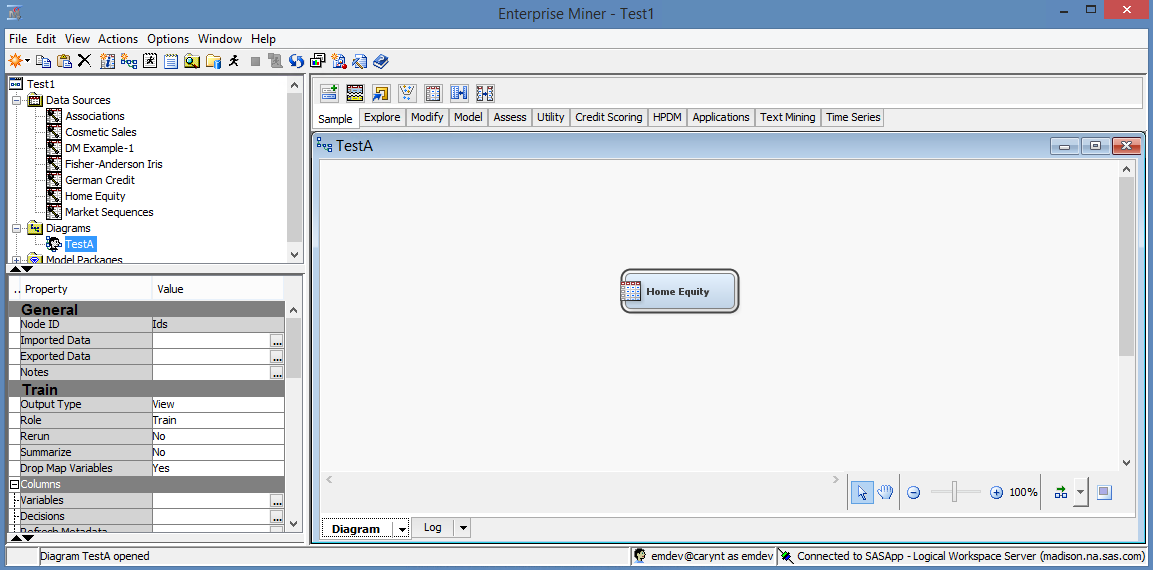
After creating a new
diagram, the project workspace for that diagram will open automatically.
In the Project Panel, select the Home Equity data
source. Click and drag this data source into the Diagram Workspace,
as shown in the image below.
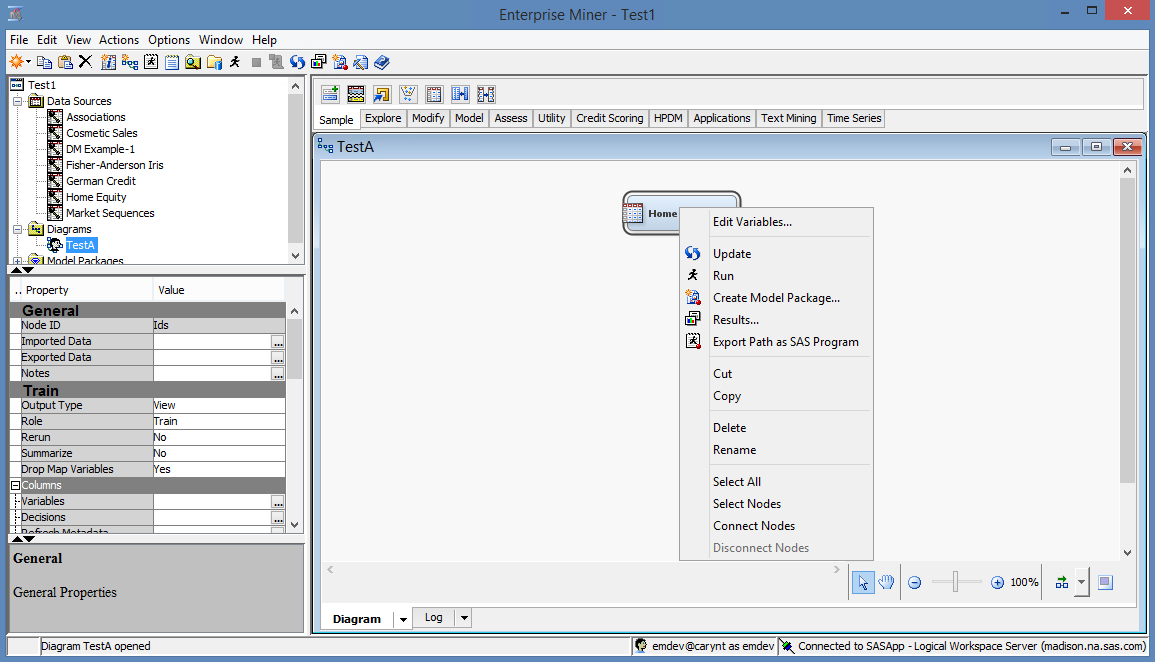
Right-click the Home
Equity node and select Run.
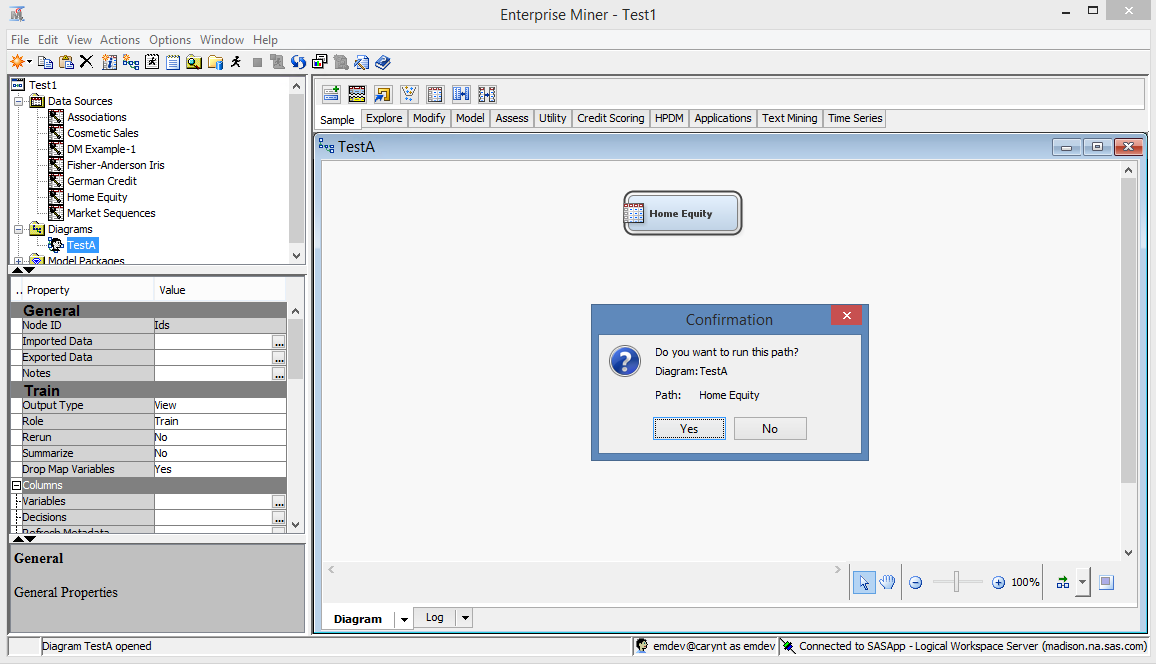
In the Confirmation window,
select Yes.
You should quickly see
a Run Status window that indicates a successful
run of the data source.
Click OK to
close the Run Status window.
At this point, the verification
is complete, and you have successfully installed and run all the major
components of SAS Enterprise Miner. To close SAS Enterprise Miner,
you can close the Enterprise Miner window,
or select FileExit. At the Confirmation window,
select Yes.
Copyright © SAS Institute Inc. All Rights Reserved.