Assessing CDISC SDTM Compliance

Overview: Assessing CDISC SDTM Compliance

You assess the structural and content compliance of a domain with a data standard (such as CDISC SDTM) by using the CDISC-SDTM Compliance transformation. You can assess an individual domain or a set of domains. The process assesses whether the selected domains comply with the data standard.
Note: For detailed information about creating a job with a transformation, see the SAS Data Integration Studio: User's Guide or the SAS Data Integration Studio online Help.

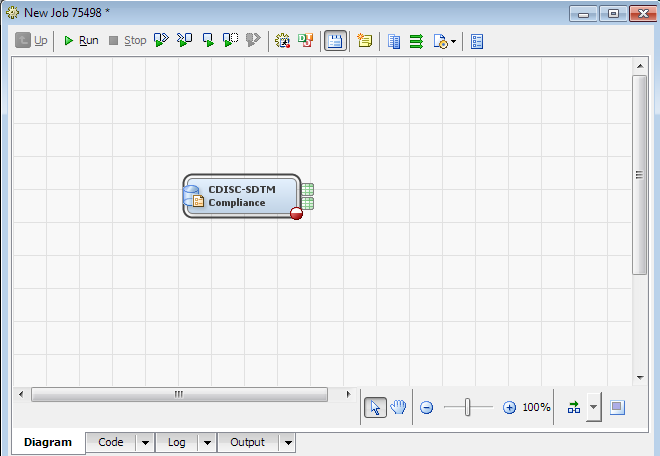
Assess CDISC SDTM Compliance

To assess CDISC SDTM compliance, perform the following steps:
  1. Create an empty job.
    For detailed information about creating a empty job, see the SAS Data Integration Studio: User's Guide or the SAS Data Integration Studio online Help.
  2. In the Transformations tree, expand Clinical, and then drag CDISC-SDTM Compliance onto the diagram.
    The Diagram tab displays the CDISC-SDTM Compliance transformation and the Results and Metrics work tables.
    CDISC-SDTM Compliance transformation on the Diagram tab
  3. (Optional) To store the Results and Metrics work tables in a permanent location, perform the following steps:
    Note: By default, the work tables are written to a temporary work location.
    1. Right-click each Work Table icon (Work Table icon), and then select Properties.
      The Properties dialog box appears.
      For detailed information about the Properties dialog box, see the SAS Data Integration Studio: User's Guide or the SAS Data Integration Studio online Help.
    2. Click the Physical Storage tab, select a SAS library for the Location field, and then click OK.
  4. In the diagram, double-click CDISC-SDTM Compliance.
    The CDISC-SDTM Compliance Properties dialog box appears.
  5. Click the Data Standard tab.
    All active SDTM data standards are displayed.
  6. Select a data standard, and then click the Tables tab.
    The studies and submissions are displayed.
  7. Expand a study or submission to view its domains.
  8. Select the domains to validate, or select the study or submission to select all of its domains.
    Note: You can select domains from multiple studies and submissions.
  9. Click the Checks tab.
  10. If no compliance checks are displayed, perform the following steps:
    1. Click Add.
      The Add Compliance Check(s) dialog box appears with a list of all available compliance checks.
      Add Compliance Check(s) dialog box
    2. Click Show details.
      Detailed information about each compliance check appears.
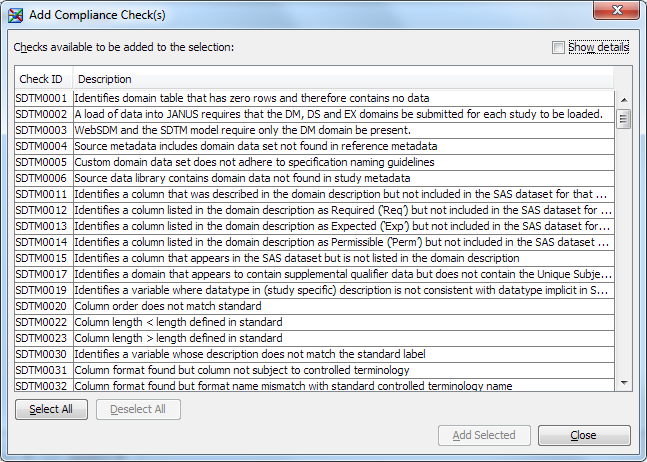
      Note: If you imported the CDISC SDTM 3.1.2 data standard, then compliance checks for this data standard also appear in the Standard column in the Checks tab. A check that has the value CDISC-SDTM applies to both the CDISC SDTM 3.1.1 and CDISC SDTM 3.1.2 standards. A check that has the value CDISC-SDTM 3.1.2 applies to the CDISC SDTM 3.1.2 standard only.
    3. Select one or more checks, click Add Selected, and then click Close.
      Note: Some check IDs are listed more than once. When you select Show details, you can view information that makes the individual compliance check unique. For example, consider the check ID SDTM0001:
      • In the first record, Source is Janus and Severity is Note. If the domain fails this compliance check, then the Results work table reports a note.
      • In the second record, Source is WebSDM and Severity is Warning. If the domain fails this compliance check, then the Results work table reports a warning.
      To be efficient, choose only a subset of the compliance checks. It is inefficient to run the same compliance checks multiple times if the only differences between the checks are severity and source.
  11. (Optional) Click the Reports tab, and perform the following steps:
    1. Perform one of the following steps:
      • Select Report by Domain and the Generate Domain Report check box
      • Select Report by Check and the Generate Check Report check box
    2. Perform one of the following steps:
      • Click Browse adjacent to Browse to Folder, and then navigate to a server folder.
      • In the Server Folder field, enter the name of a server folder.
      The folder must be on the server and must not be a local folder.
    3. Enter a name for the report in the Report File Name field, and then specify the report output format.
    4. To limit the number of records to include in the report, enter a number in the Limit # of records to field.
      If you leave this field blank, all records are included in the report.
    5. Select the panels to include in the report and whether informational messages are included.
  12. Click OK to close the CDISC-SDTM Compliance Properties dialog box.
    A green check mark next to the CDISC-SDTM Compliance transformation indicates that the transformation is complete.
    Note: If you see a red X, hover over the transformation and review the error information that appears. A typical error is that selected domains do not have a library assigned. Correct any errors before running the job.
  13. Click Run.
    SAS Data Integration Studio generates the SAS code for validating the selected data standard model, and then submits the code to SAS. The Results and Metrics work tables are generated.
  14. Review the Results work table to see the results of the compliance checks.
    You might want to connect the Results and Metrics work tables as input to the code that will be used to generate formatted reports of the results.
    Note: You might encounter errors or warnings in the SAS log during job execution. These errors or warnings do not mean that validation was unsuccessful. Most errors that halt a validation are reported in the Results work table. As a general rule, the Results work table reports failures and provides information about the cause of the failures. For more information about validation, see the SAS Clinical Standards Toolkit: User Guide.