Place an Image in a Report Section
To insert an image
into your report, complete these steps:
-
In Edit mode, click
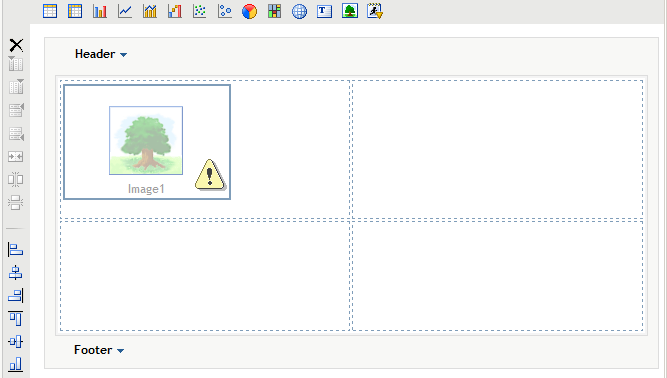
 on the horizontal toolbar. An empty placeholder object
for an image is placed in the next available cell in the layout grid.
For more information about how to position objects in the layout grid, see Overview of Positioning Report Objects.
on the horizontal toolbar. An empty placeholder object
for an image is placed in the next available cell in the layout grid.
For more information about how to position objects in the layout grid, see Overview of Positioning Report Objects. -
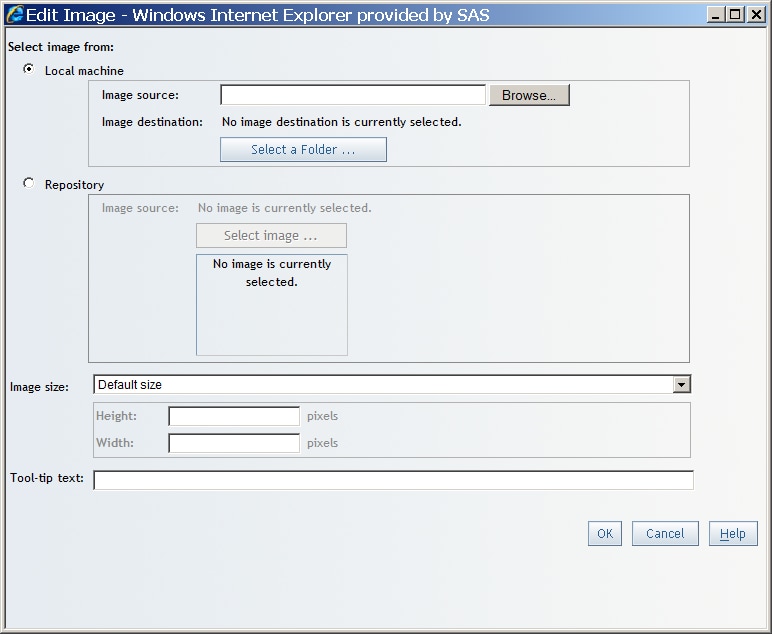
Select the image from one of the following locations:Local machineSelect this option to choose an image from your local machine. Click Browse to choose a file on your local machine. The path to the selected image appears in the Image source field. Click Select a Folder to choose a destination for the image in the repository. In the Select Folder dialog box, you can create a new folder by clicking
 . Click OK.
RepositorySelect this option to choose an image that is stored on the same server as the reports. Click Select image to open the Select Image dialog box. (Only images appear in the Select Image dialog box. No other types of data sources appear.) Select an image. Click OK. You will see the image displayed below the Select image button in the Edit Image dialog box.
. Click OK.
RepositorySelect this option to choose an image that is stored on the same server as the reports. Click Select image to open the Select Image dialog box. (Only images appear in the Select Image dialog box. No other types of data sources appear.) Select an image. Click OK. You will see the image displayed below the Select image button in the Edit Image dialog box.