To edit
or delete a schedule associated with a report, stored process, or
folder, complete these steps:
Note: Only authorized
users can edit or delete reports that they have scheduled. If you
have questions about your authorization, contact your system administrator.
-
From the
Welcome window or Edit mode, click
File Manage Files
 to access the
File Management window.
Note: You can also
use the Choose or Create a Distribution page in the
Schedule
Report Wizard to edit or delete schedules.
-
Open the
Scheduled and Distributed Reports dialog box. The name
of the link that opens the dialog box depends on your role:
-
If you do not have permission
to schedule or distribute reports, you will not see a link.
-
If you can schedule but not distribute
reports, then click
View my scheduled reports.
-
If you can both schedule and distribute
reports, then click
View my scheduled and distributed
reports.
-
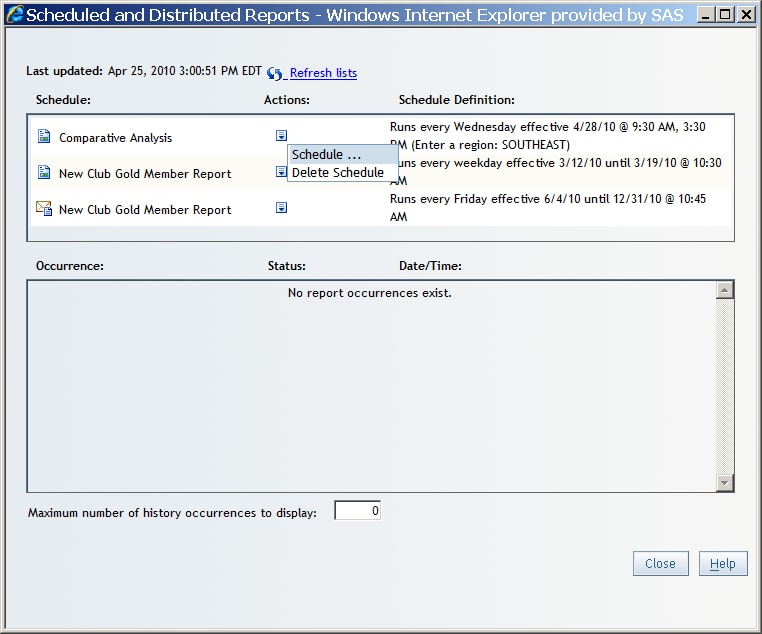
Next to
any scheduled occurrence of the report or folder of reports that you
want to edit, click

in the
Actions column.
Scheduled and Distributed Reports Dialog Box
-
If you
want to edit the schedule for a report, select
Schedule. Make your changes in the
Schedule Report Wizard.
-
If you
want to delete a schedule, select
Delete Schedule. In the confirmation message box that appears, click
OK.
Note: When you delete
a schedule, all references to executing the schedule are also removed
from the
Occurrence, Status, Date/Time box.
-