To print
a report, complete these steps:
Note: New report
sections that are added to reports that were originally created in
SAS Enterprise Guide do not include a static report creation date
in the printed output.
-
Depending
on your location, perform one of these tasks to open the Print dialog
box:
-
In View mode, select
File Print
Print.
-
In the
File Management window, next to the name of the report that you want to print, click

in the
Actions column, and
then select
Print.
Note: If this is
a manually refreshed report, then you must refresh the data before
you can select printing options. However, you can click
Print to PDF in the Print dialog box to print the report
with the current options.
-
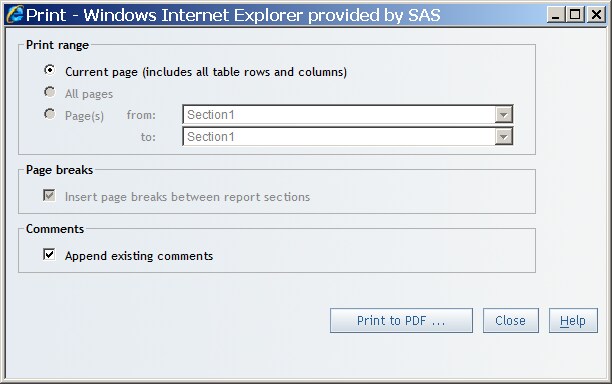
Specify
a
Print range by using these options:
Current page (includes all table rows and columns)
Select this option
if you want to print only the content that is currently shown in View
mode. This means that only the content within the currently displayed
group break value (if the report author chose to break a new page
for each value) and within the current section is printed.
Select this option
if you want to print the entire report.
Select this option
if you want to print a portion of the report. After you select this
option, you can then select where you want the printed portion to
begin and end by using the two drop-down lists.
-
(Optional)
Select
Page breaks to insert page breaks
between report sections.
-
(Optional)
Select
Append existing comments to append
comments to the end of the report.
-
To display
the PDF output that you can print or save, click
Print
to PDF.
-
In Adobe
Acrobat, complete these steps:
-
Select
FilePrint to open the Print dialog box.
-
To send
the report to the specified printer, click
OK.
-
To exit
Adobe Acrobat, select
FileClose.
-
To close
the Print dialog box, click
Close.