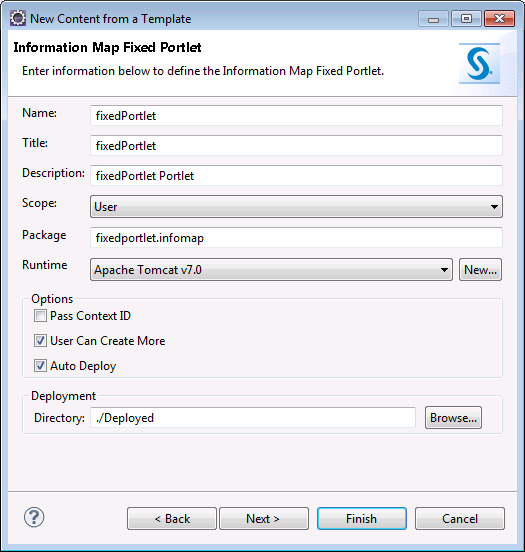
Create an Information Map Fixed Portlet from Data

Introduction

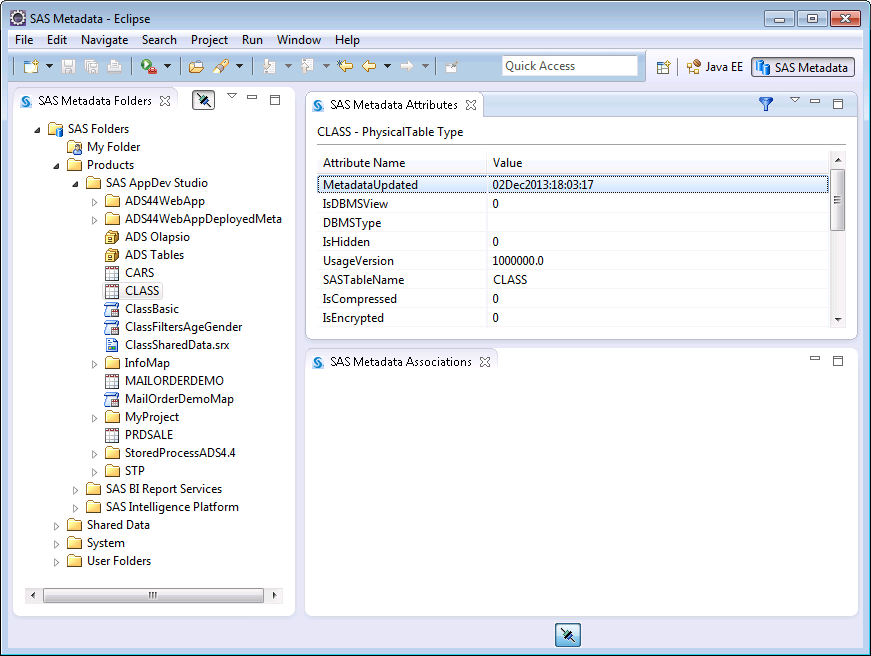
This walk-through explains project creation from the SAS Metadata perspective. The SAS Metadata perspective functions as both a metadata explorer and as a starting 
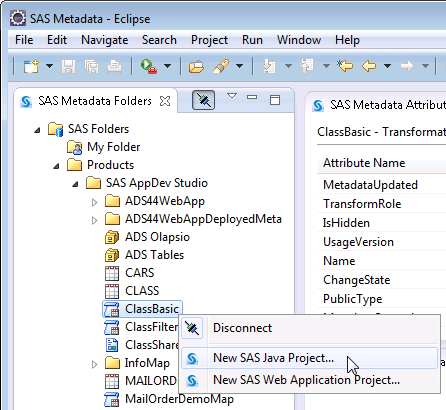
point for data-driven development. You can create projects from tables, information maps, and stored processes. From those data sources, you can create SAS Web Application projects or SAS Java Projects. The type of template that you can add to a project is determined by the type of data that you select from the SAS Metadata perspective.
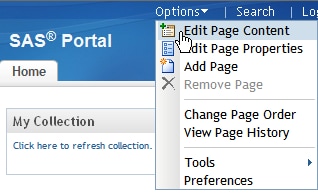
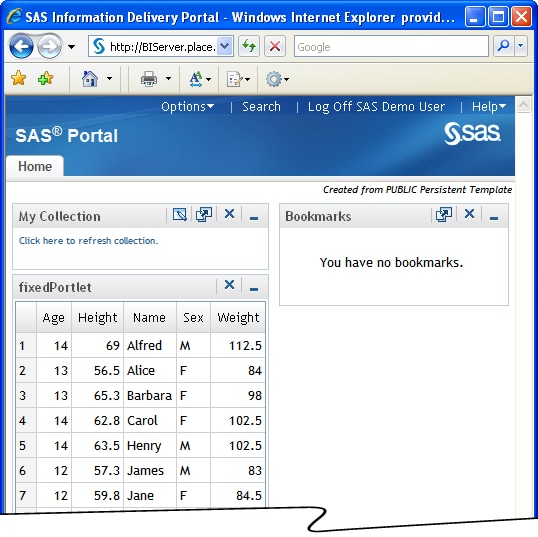
SAS Metadata Perspective
This walk-through assumes the following:
  • you have access to a SAS Information Delivery Portal.
  • you have access to an Information Map on the Metadata server.
  • you have Write access to the portal deployment directory (for example, \Lev1\Web\Applications\SASPortlets4.4\Deployed)..
  • a Metadata Server Connection Profile exists for the server that you are developing against.

Switch to the SAS Metadata Perspective and Create the Project

  1. Connect to the SAS Metadata Server if you are not already.
  2. Switch to the SAS Metadata perspective. Select Windowthen selectOpen Perspectivethen selectOther, and then choose SAS Metadata.
  3. Navigate to an Information Map. Right-click it and select New SAS Java Project.
    This example uses an Information Map based on the sashelp.class data set.
    Create the project from the Information Map
  4. Name the project fixedPortlet, and click Next.
  5. Click Next to accept the selected template: SAS Information Delivery Portal Information Map Fixed Portlet.
    The template list is determined by the type of data that you selected from the Metadata perspective.
    Template Selection
  6. Click Finish to accept the Information Map Fixed Portlet configuration and create the project.
    Portlet Information

Deploy the Portlet

To deploy the portlet to the SAS Information Delivery Portal, create a par (portlet archive) file and copy it to the deployment directory. The par file contains all generated classes and static content.
  1. Switch to the Java perspective.
  2. Close the portlet.xml file.
    For information about the portlet.xml editor, see The Portlet Editor.
  3. Open the project directory, right-click fixedPortletParBuild.xml, and select Build and Copy Par.
    This XML file was created when you added the Fixed Portlet template, and follows the pattern <projectName>ParBuild.xml. You can specify additional content to include in the par file by editing this file.
  4. Navigate to or enter the path for the deployed portal directory: \Lev1\Web\Applications\SASPortlets4.4\Deployed, and click OK.
    The par file is created, appears in the file list in Eclipse, and is copied to the \Deployed directory. The Par filename is created with the pattern <projectName>.par. In this case, the Par file is named fixedPortlet.par.

View the Portlet in the SAS Information Delivery Portal

  1. Navigate to your SAS Information Delivery Portal. For example: BIServer.place.com:8080/SASPortal
  2. Select Customizethen selectEdit Pagethen selectEdit Page Content.
    Edit the page contents
  3. Click Add Portlets.
  4. For the Portlet type select fixedPortlet.
  5. For the Name, enter fixedPortlet.
  6. Click Add, Done, and then OK to confirm your choices and return to the portal Home.
  7. The portlet is displayed in the SAS Information Delivery Portal.
    The Portlet in the Portal